Tokens
In order to access the Artifactz.io API, plugins require an API token. These tokens are personal and linked to a user account. There are two scopes that can be enabled with a token:
- “Read registered artifact” - allows clients to query artifact versions and can be useful with the Gradle plugin, which only queries the versions of the configured Java libraries.
- “Register and update artifact” - allows clients to create, update, or push an artifact through the flow, which is necessary for publish artifact or push artifact API calls.
A created token must have at least one scope assigned to it.
To view the current list of tokens, navigate to the “API Tokens” section by clicking on the “Tokens” option in the left-hand menu. Only the last four characters of the token are revealed on the Token View Screen. The full API token is only visible to the user on the Token View Screen post-creation.
Below is what the section looks like:
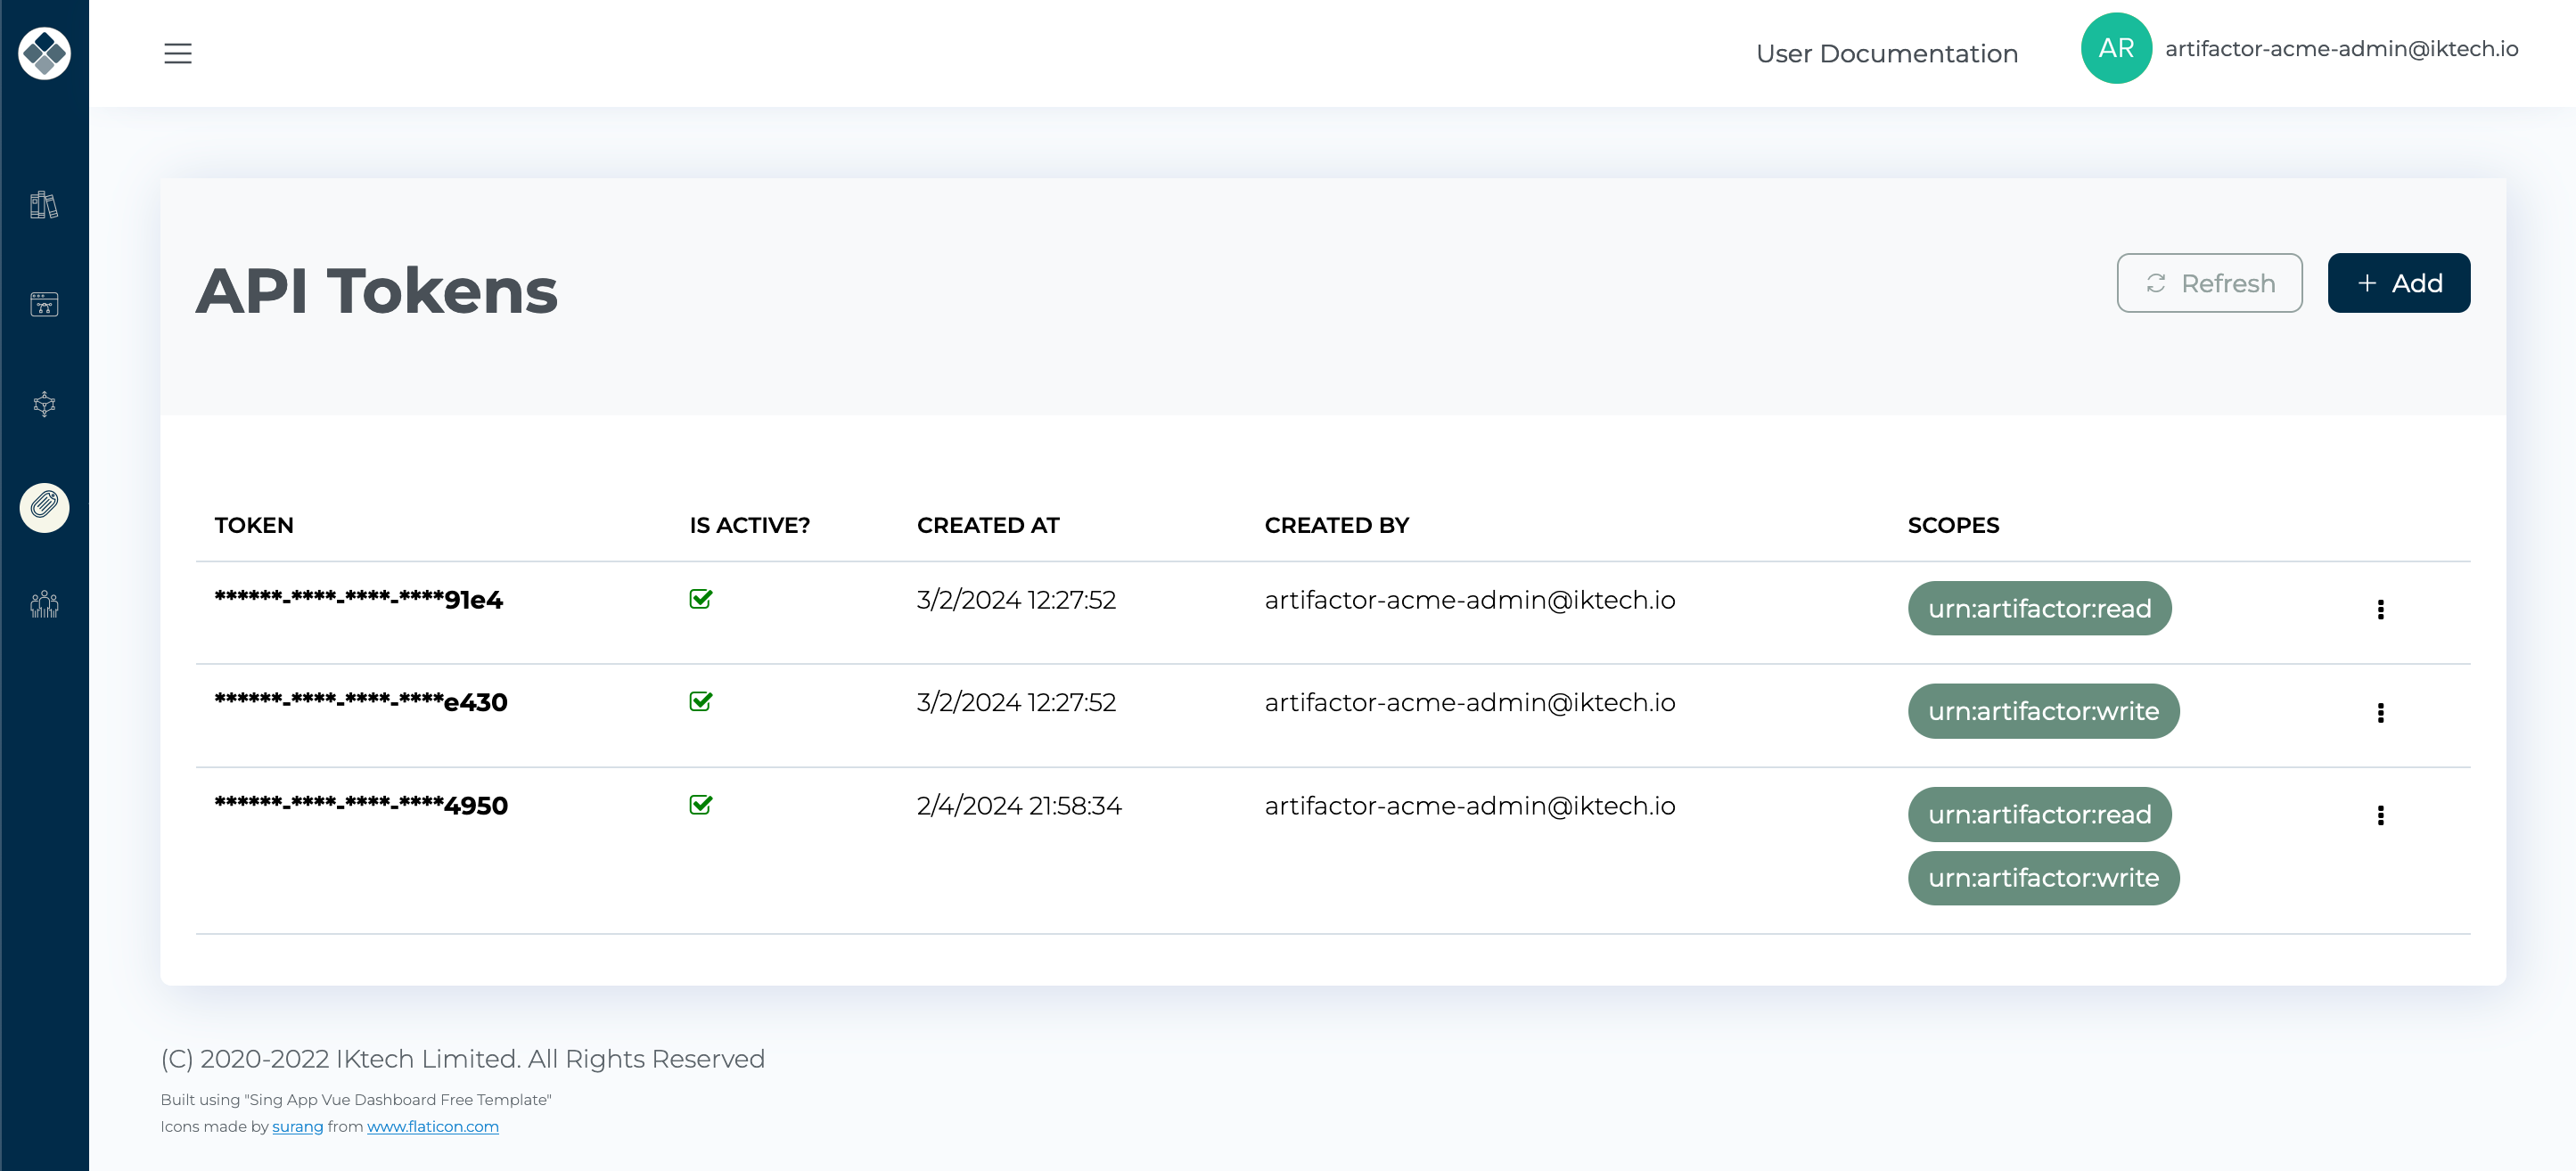
From the Token View screen, you have the ability to add a new token or deactivate or delete an existing one.
Each row in the table represents a registered token associated with the current user.
To update the content of the API Tokens View Screen, click the “Refresh” button. To add a new token, click the “Add” button at the top of the list. To deactivate or delete a token, use the context menu on the right end of each row in the table.
To create a new token, click the “Add” button on the Tokens page. A pop-up dialog box, as shown below, will appear:

In the dialog box, select the desired token scopes. At least one scope is required to create a token. Click the “Add” button to create the new token or the “Cancel” button if you wish to cancel.
Once you click the “Add” button, a new token will be generated and displayed on the Tokens View Screen:

Note that this is the only time when the token will be revealed. When the token is fully displayed, a small “Copy” icon is placed next to it for the user to copy the newly created token. Alternatively, simply select the token on the screen and copy it. Ensure to copy it immediately and store it safely, as there is no way to recover it.
To display the context menu on the “Tokens View Screen”, click the “three dots” button next to the token scopes, prompting a context menu to appear, as shown below:

From this menu, you can deactivate or delete the token from which the context menu was invoked.
To disable a token, it can be deactivated.
To deactivate a token, select the corresponding option from the context menu. A confirmation dialog box will appear:
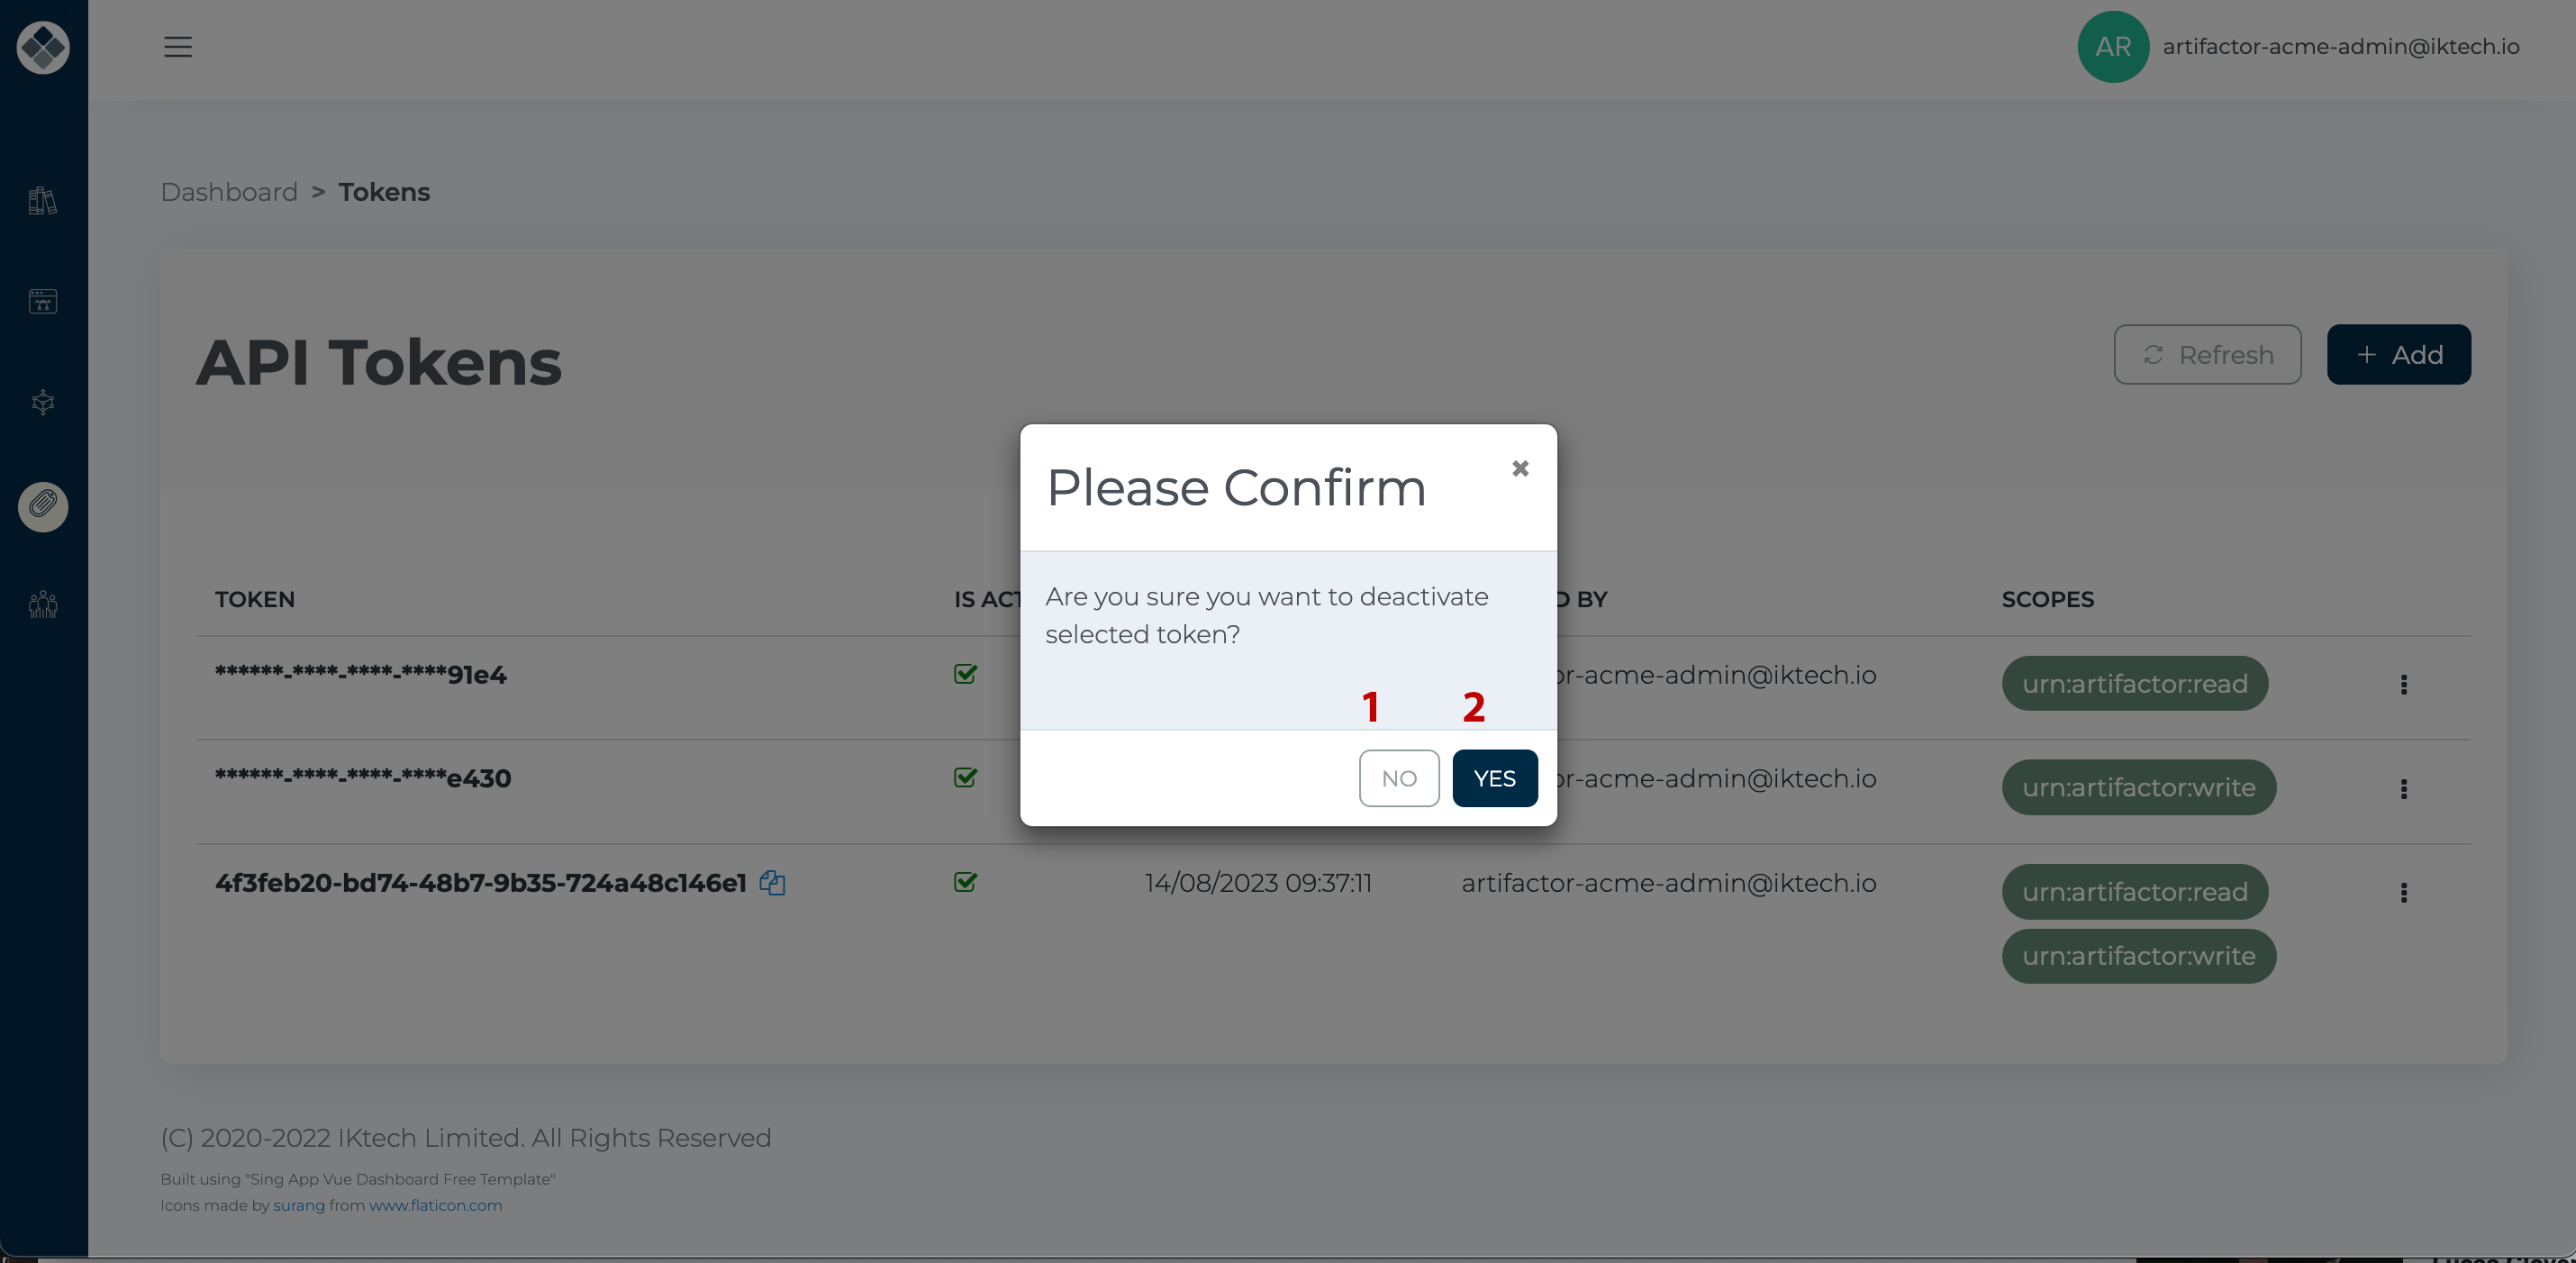
At this point, there is no way to reactivate a token.
Clicking on the “Delete” option will prompt a confirmation dialog:
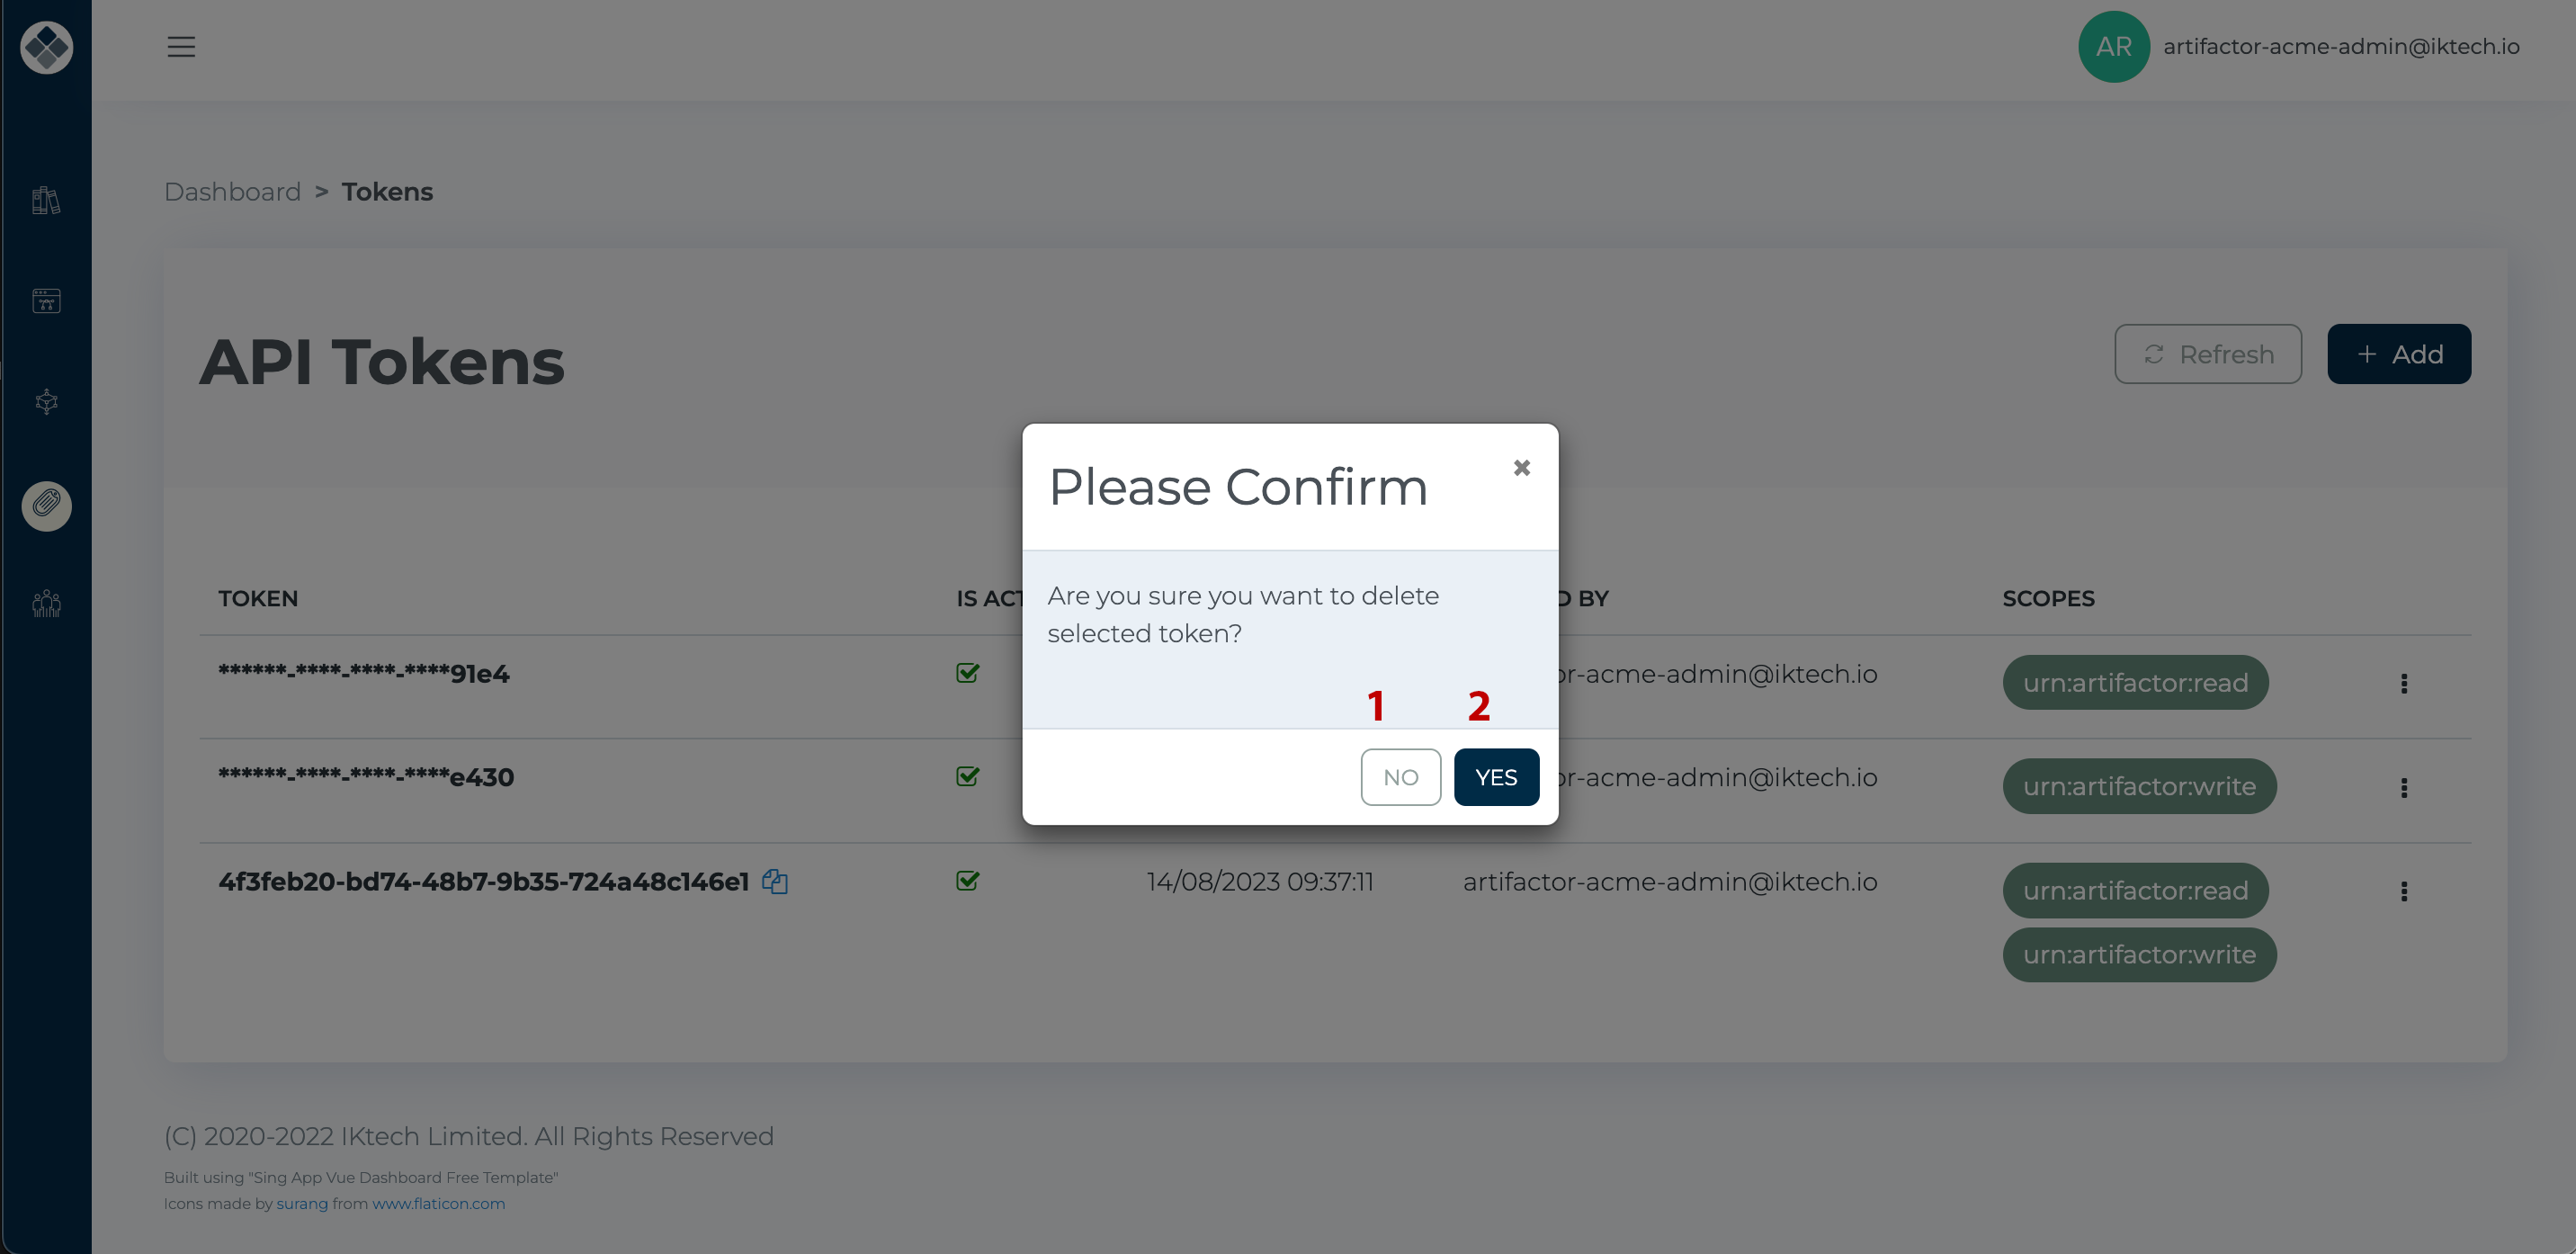
Follow the on-screen instructions to confirm the token’s deletion by selecting “Yes”. To cancel, click “No”.