Stages
A “Stage” in the context of our service represents a distinctly identifiable phase within the Software Development Lifecycle (SDLC). These stages are defined by the characteristic state of stability that software artifacts possess when residing within them. An example of a “Stage” could include Development, User Acceptance Testing (UAT), or Production.
Each “Stage” is identified uniquely by a case-sensitive name - meaning “Development ” is not synonymous with “development”. The format in which the stage name is written is not imposed, and is left to be determined per discretion within your company’s standards and best practices.
If a user submits a payload via a direct API call or through plugins using a non-existent name, it will be automatically created within the system. Otherwise, the artifact will be assigned to an existing stage whose name is used in the request.
However, we recommend creating the required stages in advance - particularly if they form part of a flow.
To view the current list of stages, navigate to the “Stages” section by selecting the “Stages” option on the left-hand menu.
Here is what the section looks like:
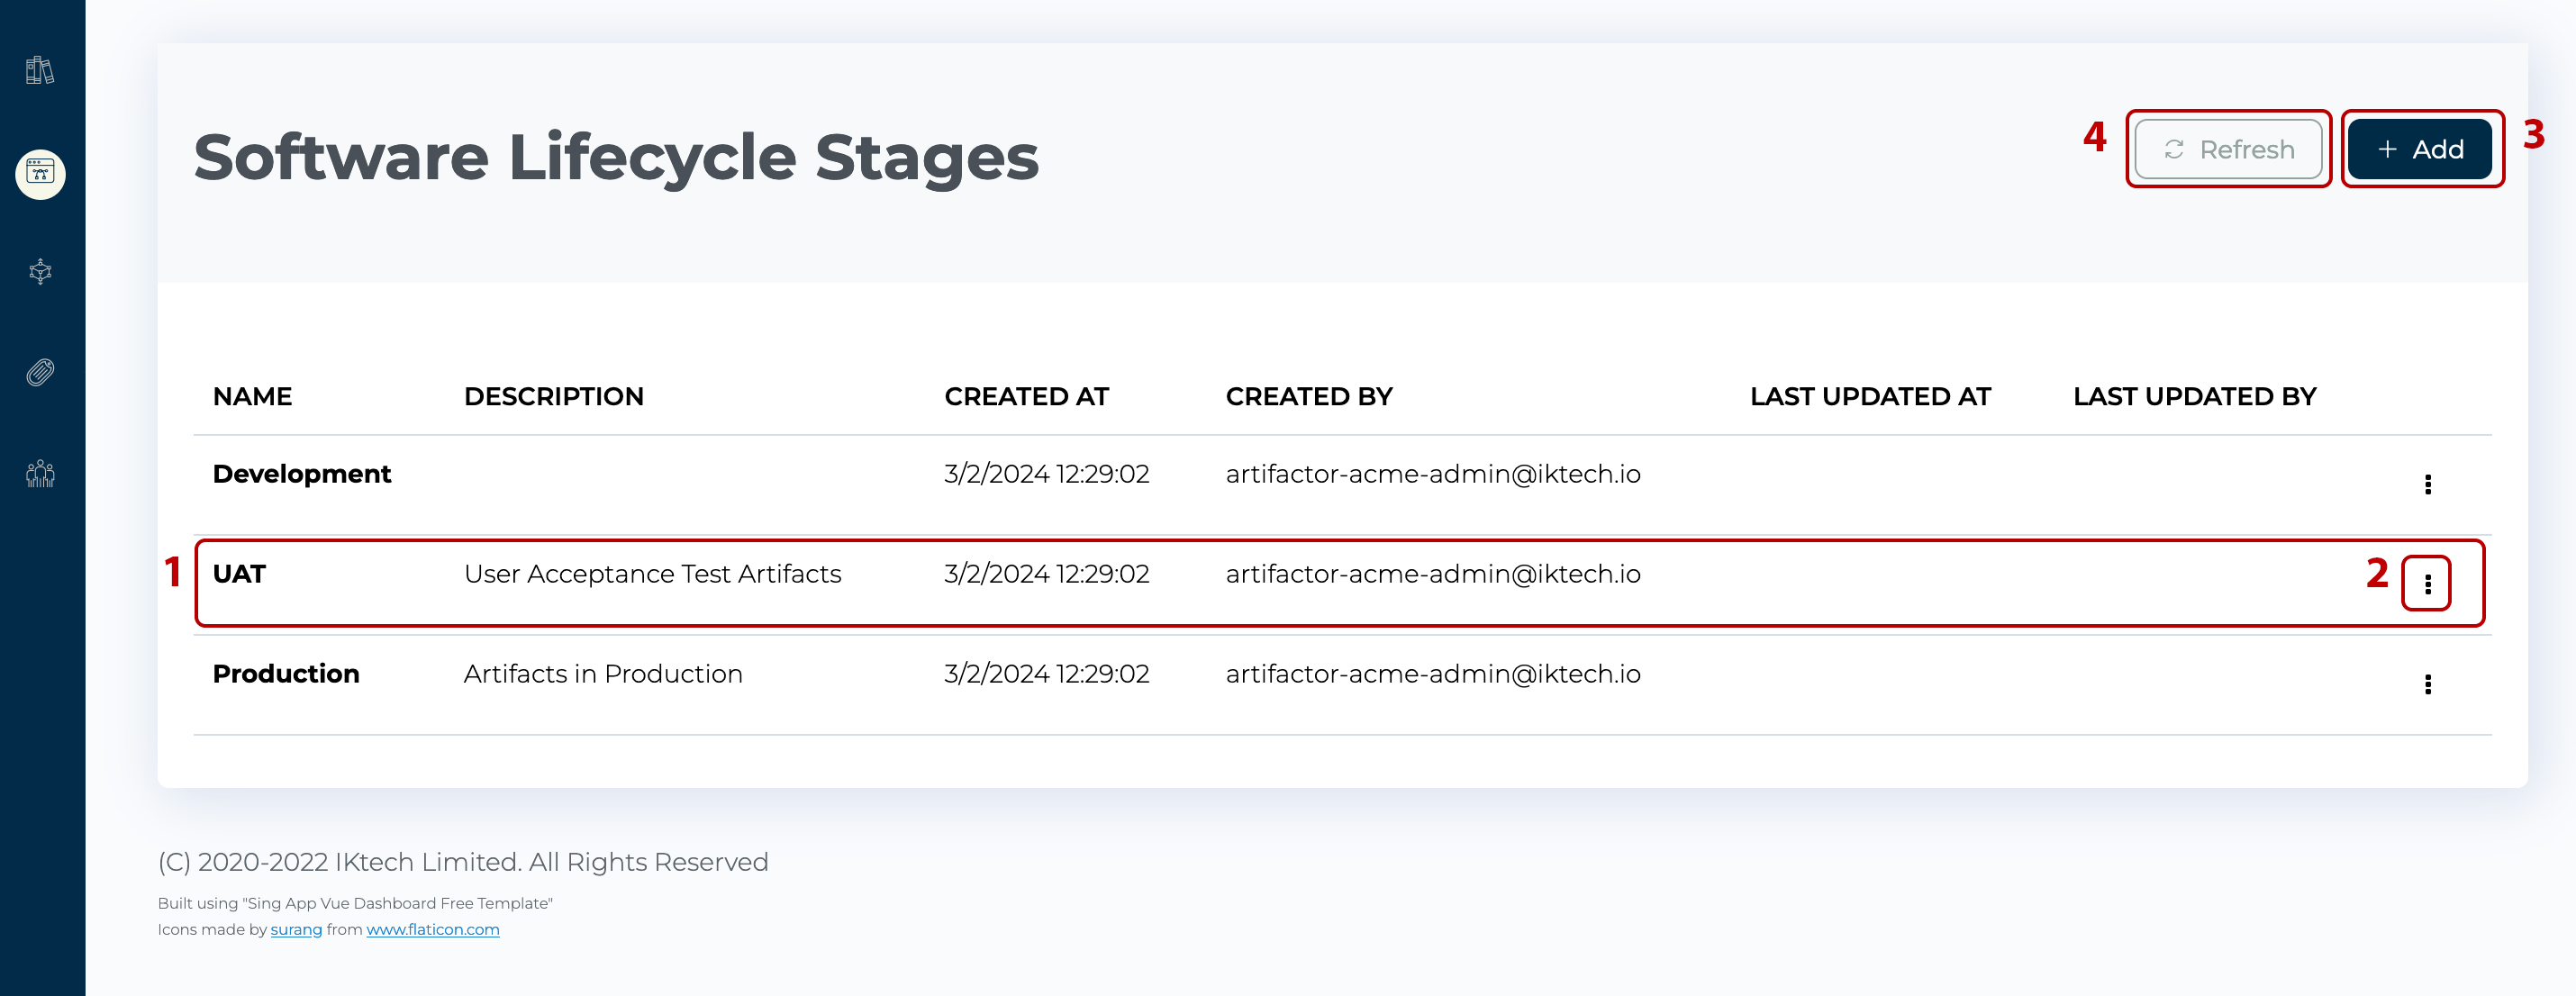
Each row in the table represents a stage that has been defined for your tenant [1].
From here, you have the capability to add a new stage, edit existing stage details, or delete a stage.
To update the content of the Stages View Screen, click the “Refresh” button [4]. To add a new stage click “Add” button [3]. To modify or delete a stage, use the context menu [2] on the right end of each row in the table.
To create a new stage, click the “Add” button [3] on the Stages page. A pop-up dialog box as shown below will appear:
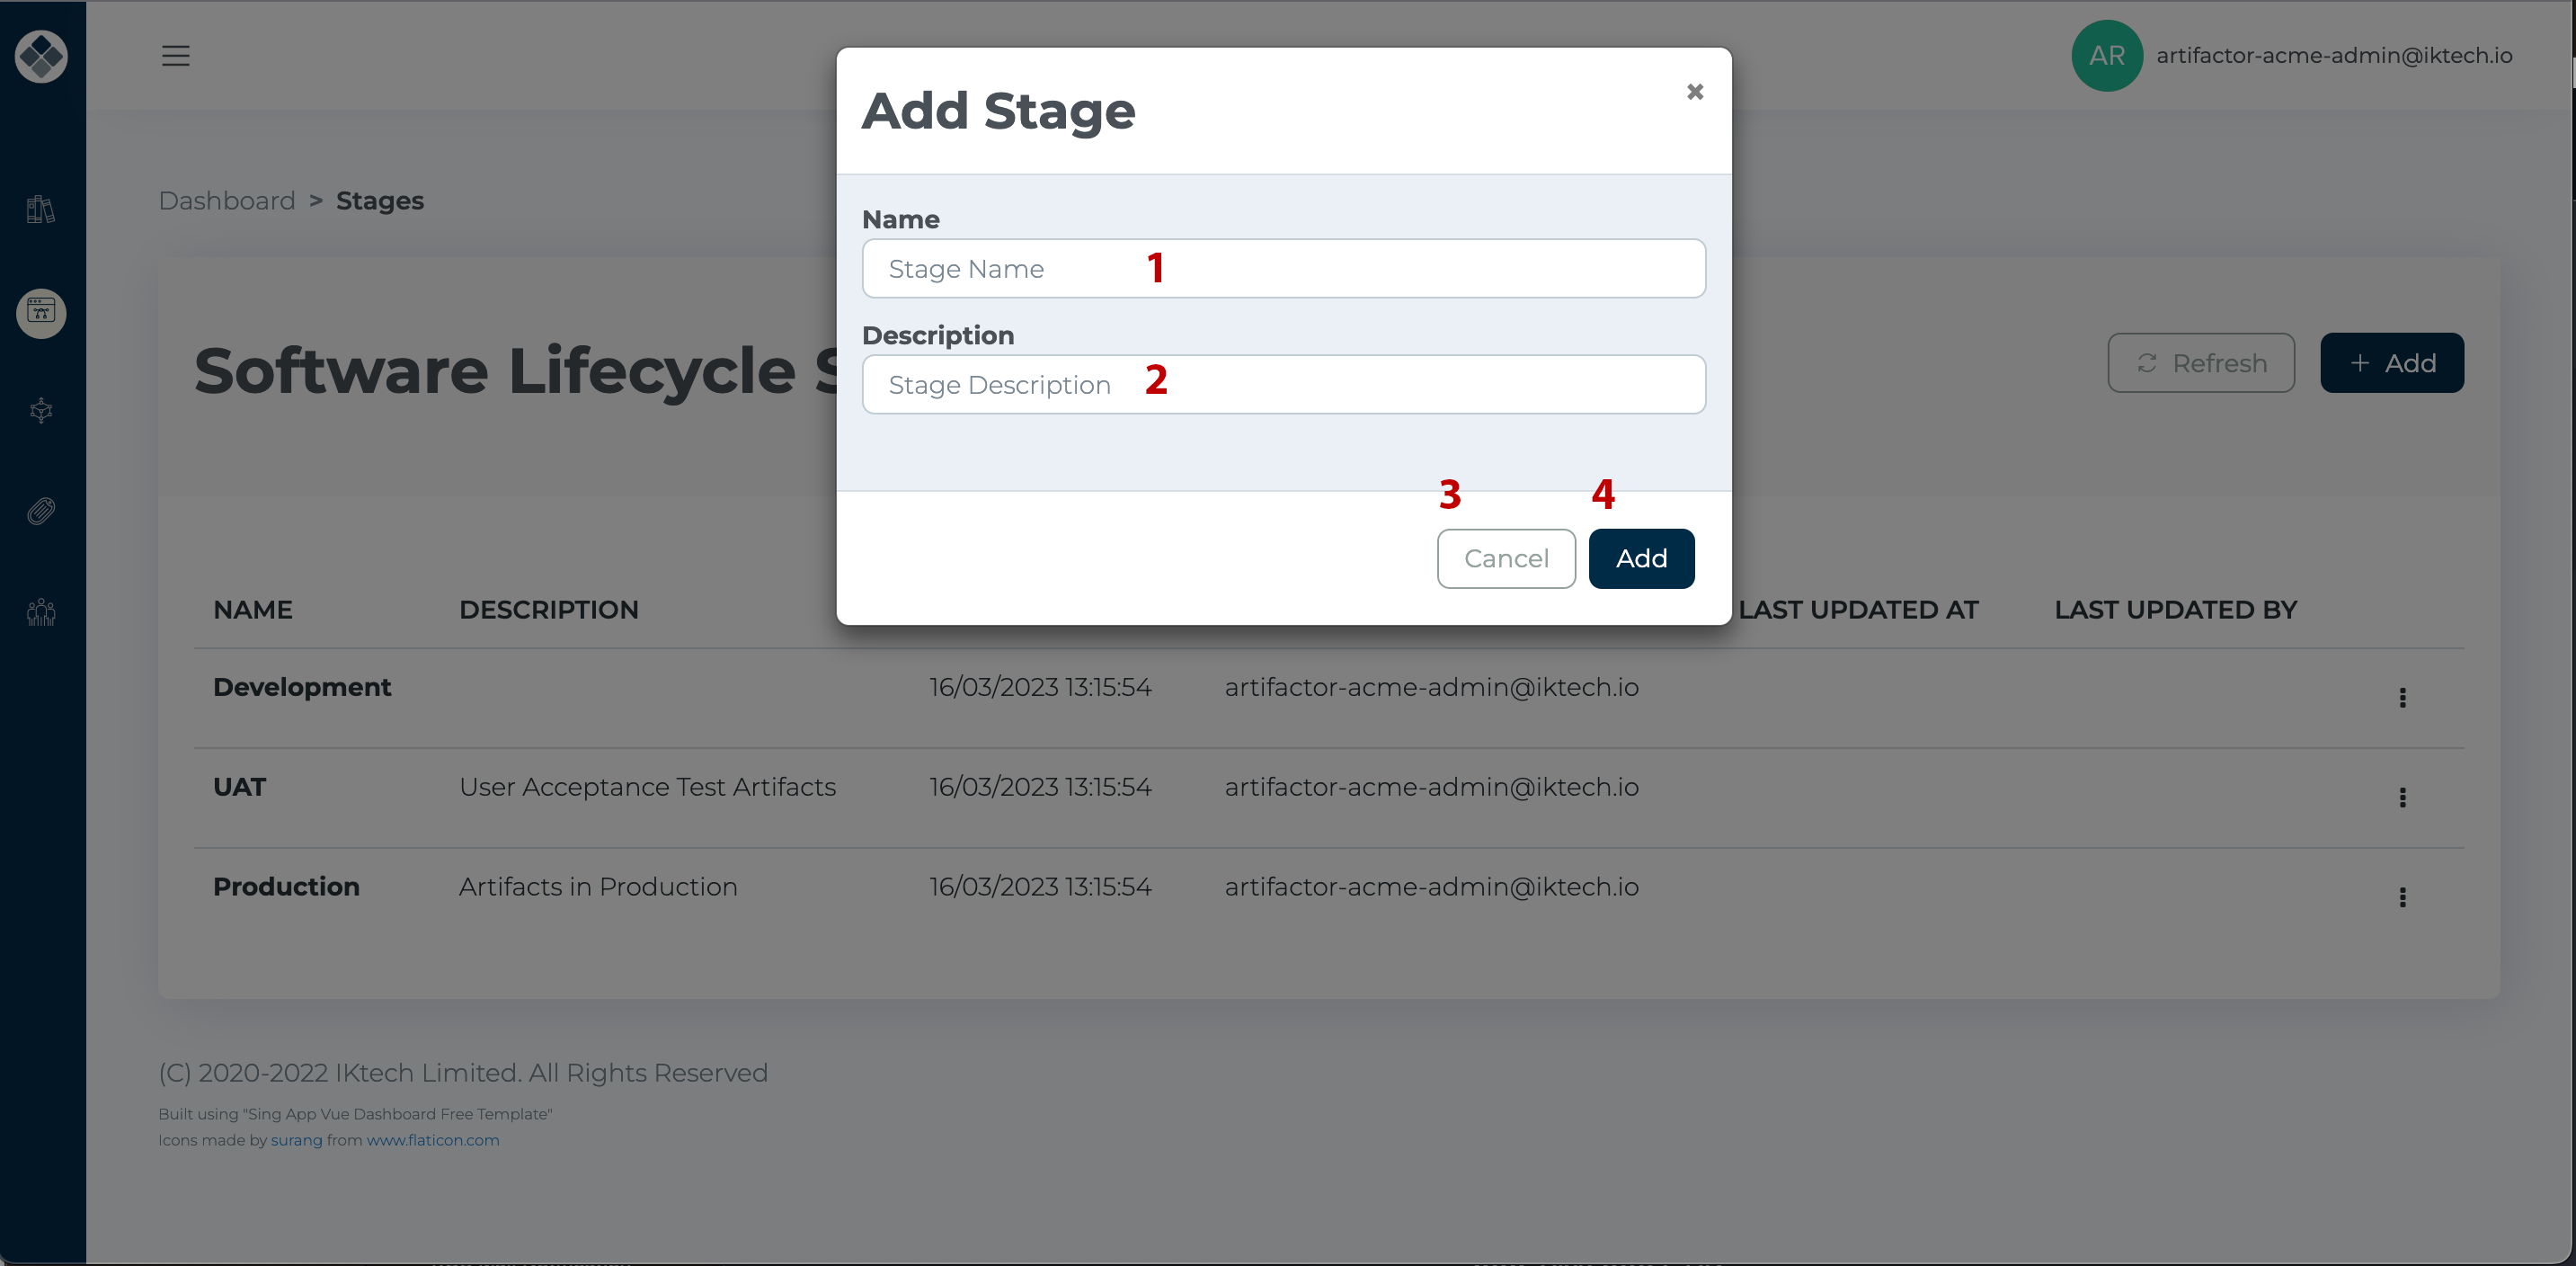
In the dialog box, you can define the Name [1] and an optional Description [2] of the new stage. Click “Add” [4] to construct the new stage. If you wish to cancel, select the “Cancel” [3] button.
To display the context menu on the “Stages View Screen”, click the “three dots” button [2]. This causes a context menu to pop up, as shown below:

From this menu, you can modify or delete the stage that the context menu was invoked from.
When the “Edit” [1] option is selected, a dialog box identical to the one used for adding a stage will appear at the top of the screen. Here, you can alter the stage name and/or description, and then click the “Save” button to retain changes. Clicking the “Cancel” button will dismiss the dialog box.
When the “Delete” [2] option is selected, a confirmation dialog box, as depicted below, will be presented:
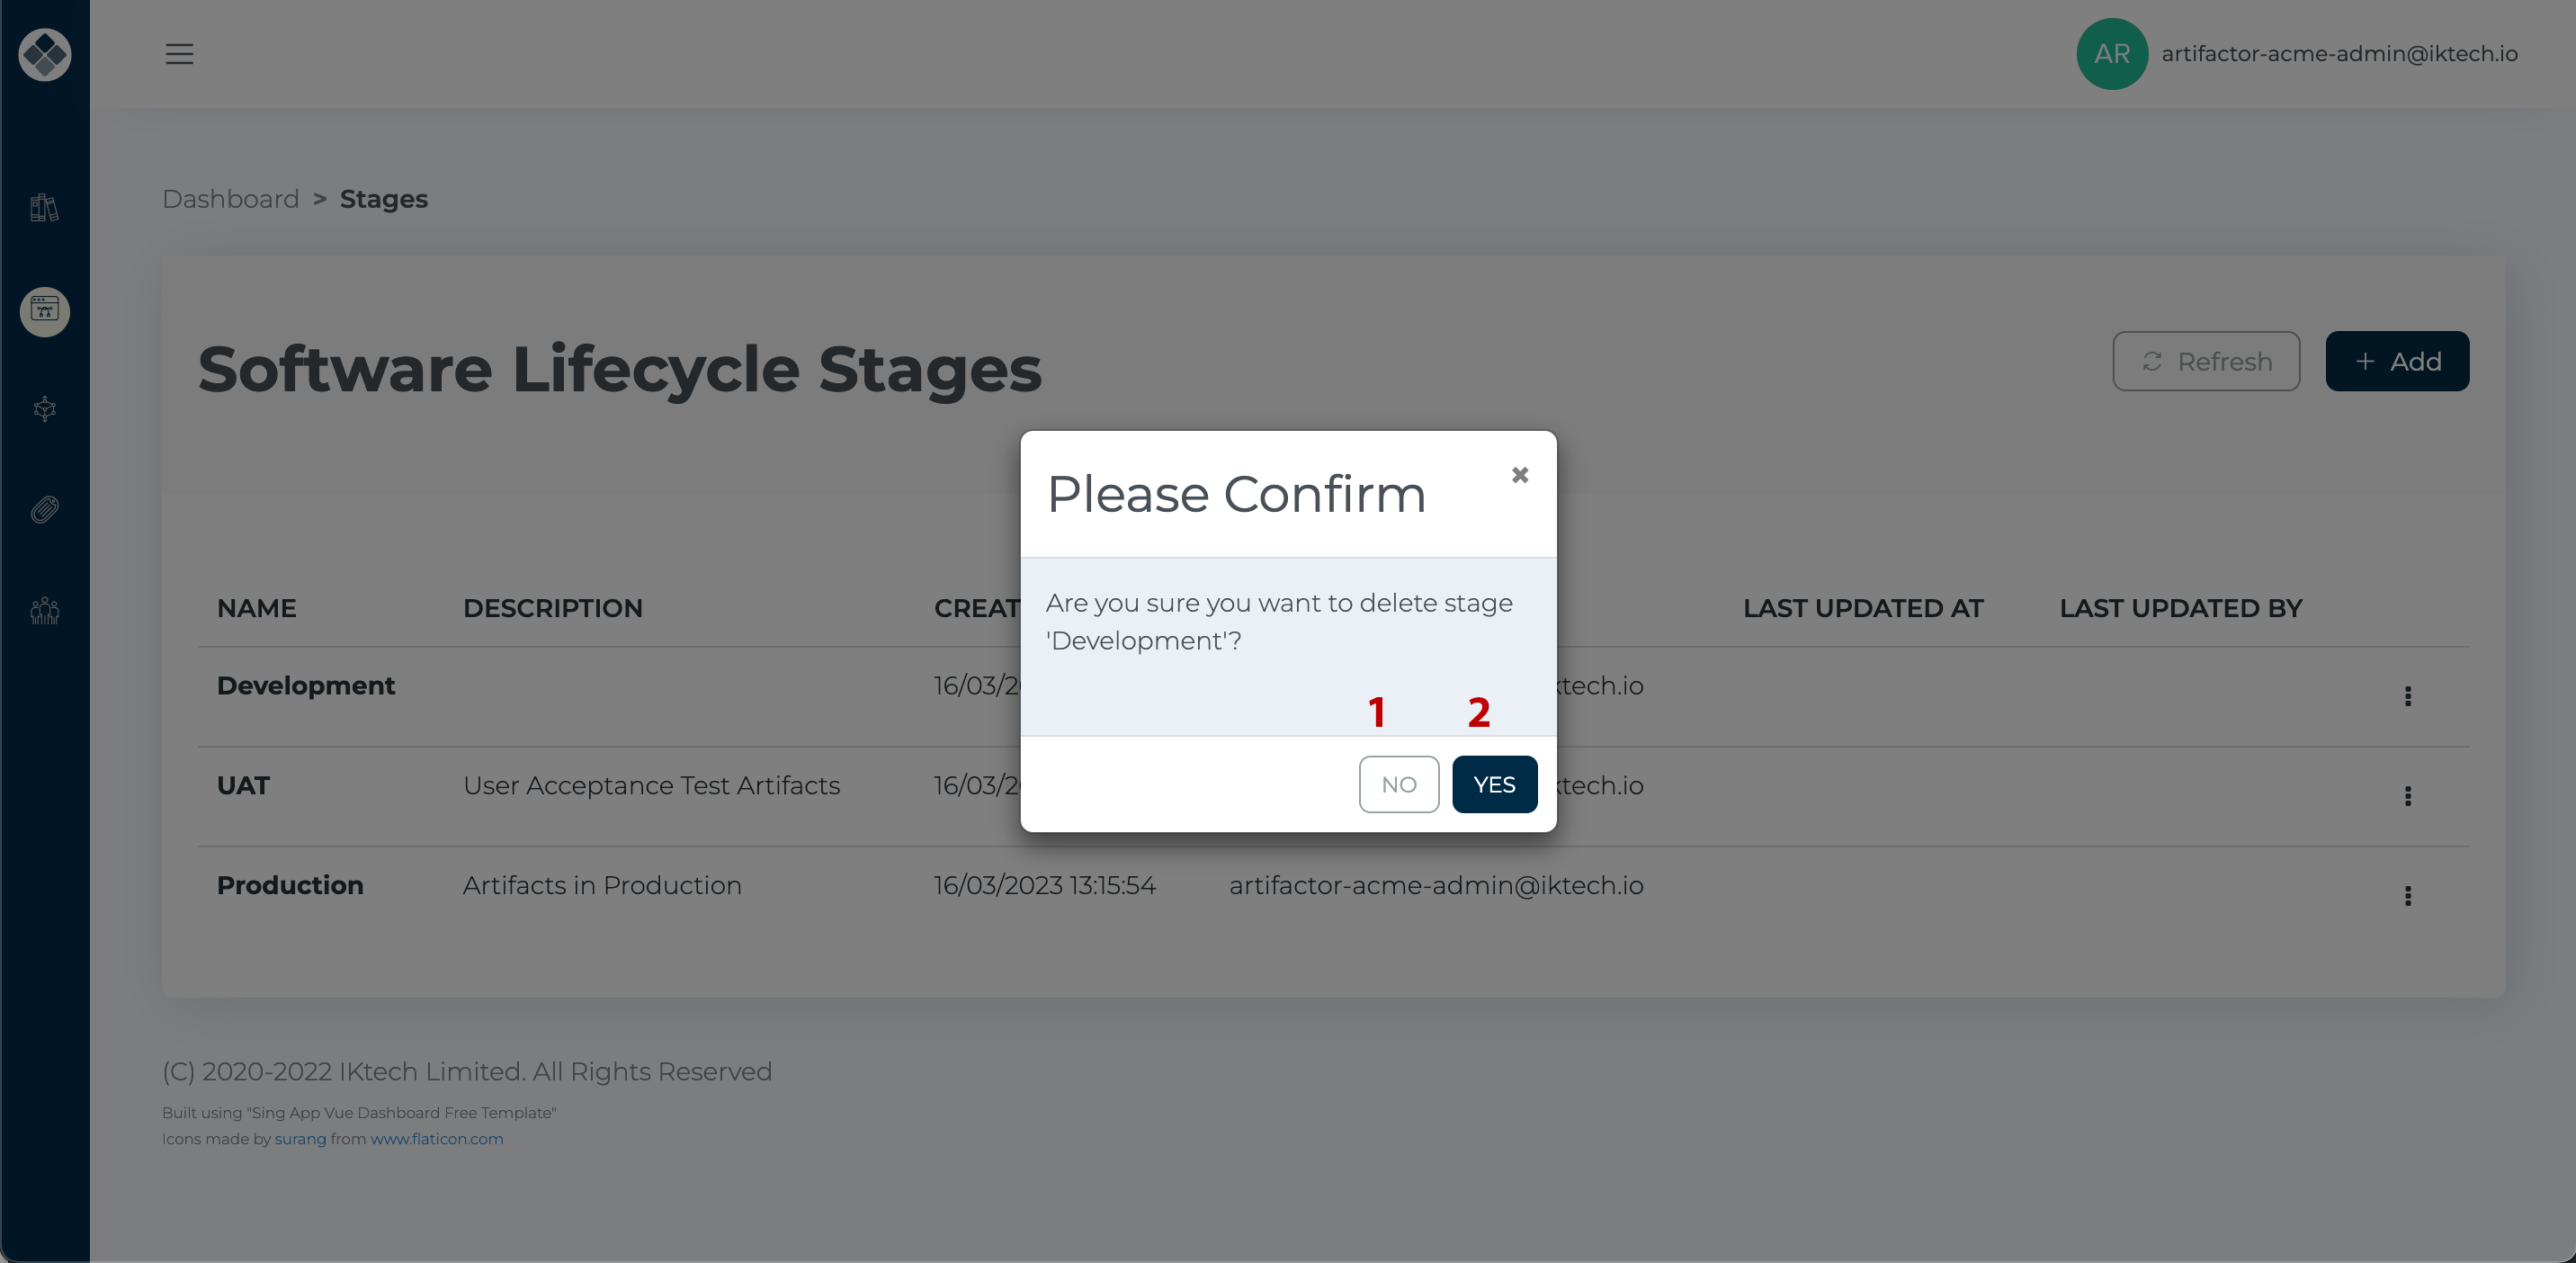
Follow the prompts within the dialog box to confirm the stage deletion by clicking the “Yes” [2] button. If you wish to cancel the operation, select the “No” [1] button.