Artifacts
The Artifacts viewer displays all registered artifacts along with their corresponding version tags, segmented by each stage.
Below is an example of what the Artifacts viewer looks like:
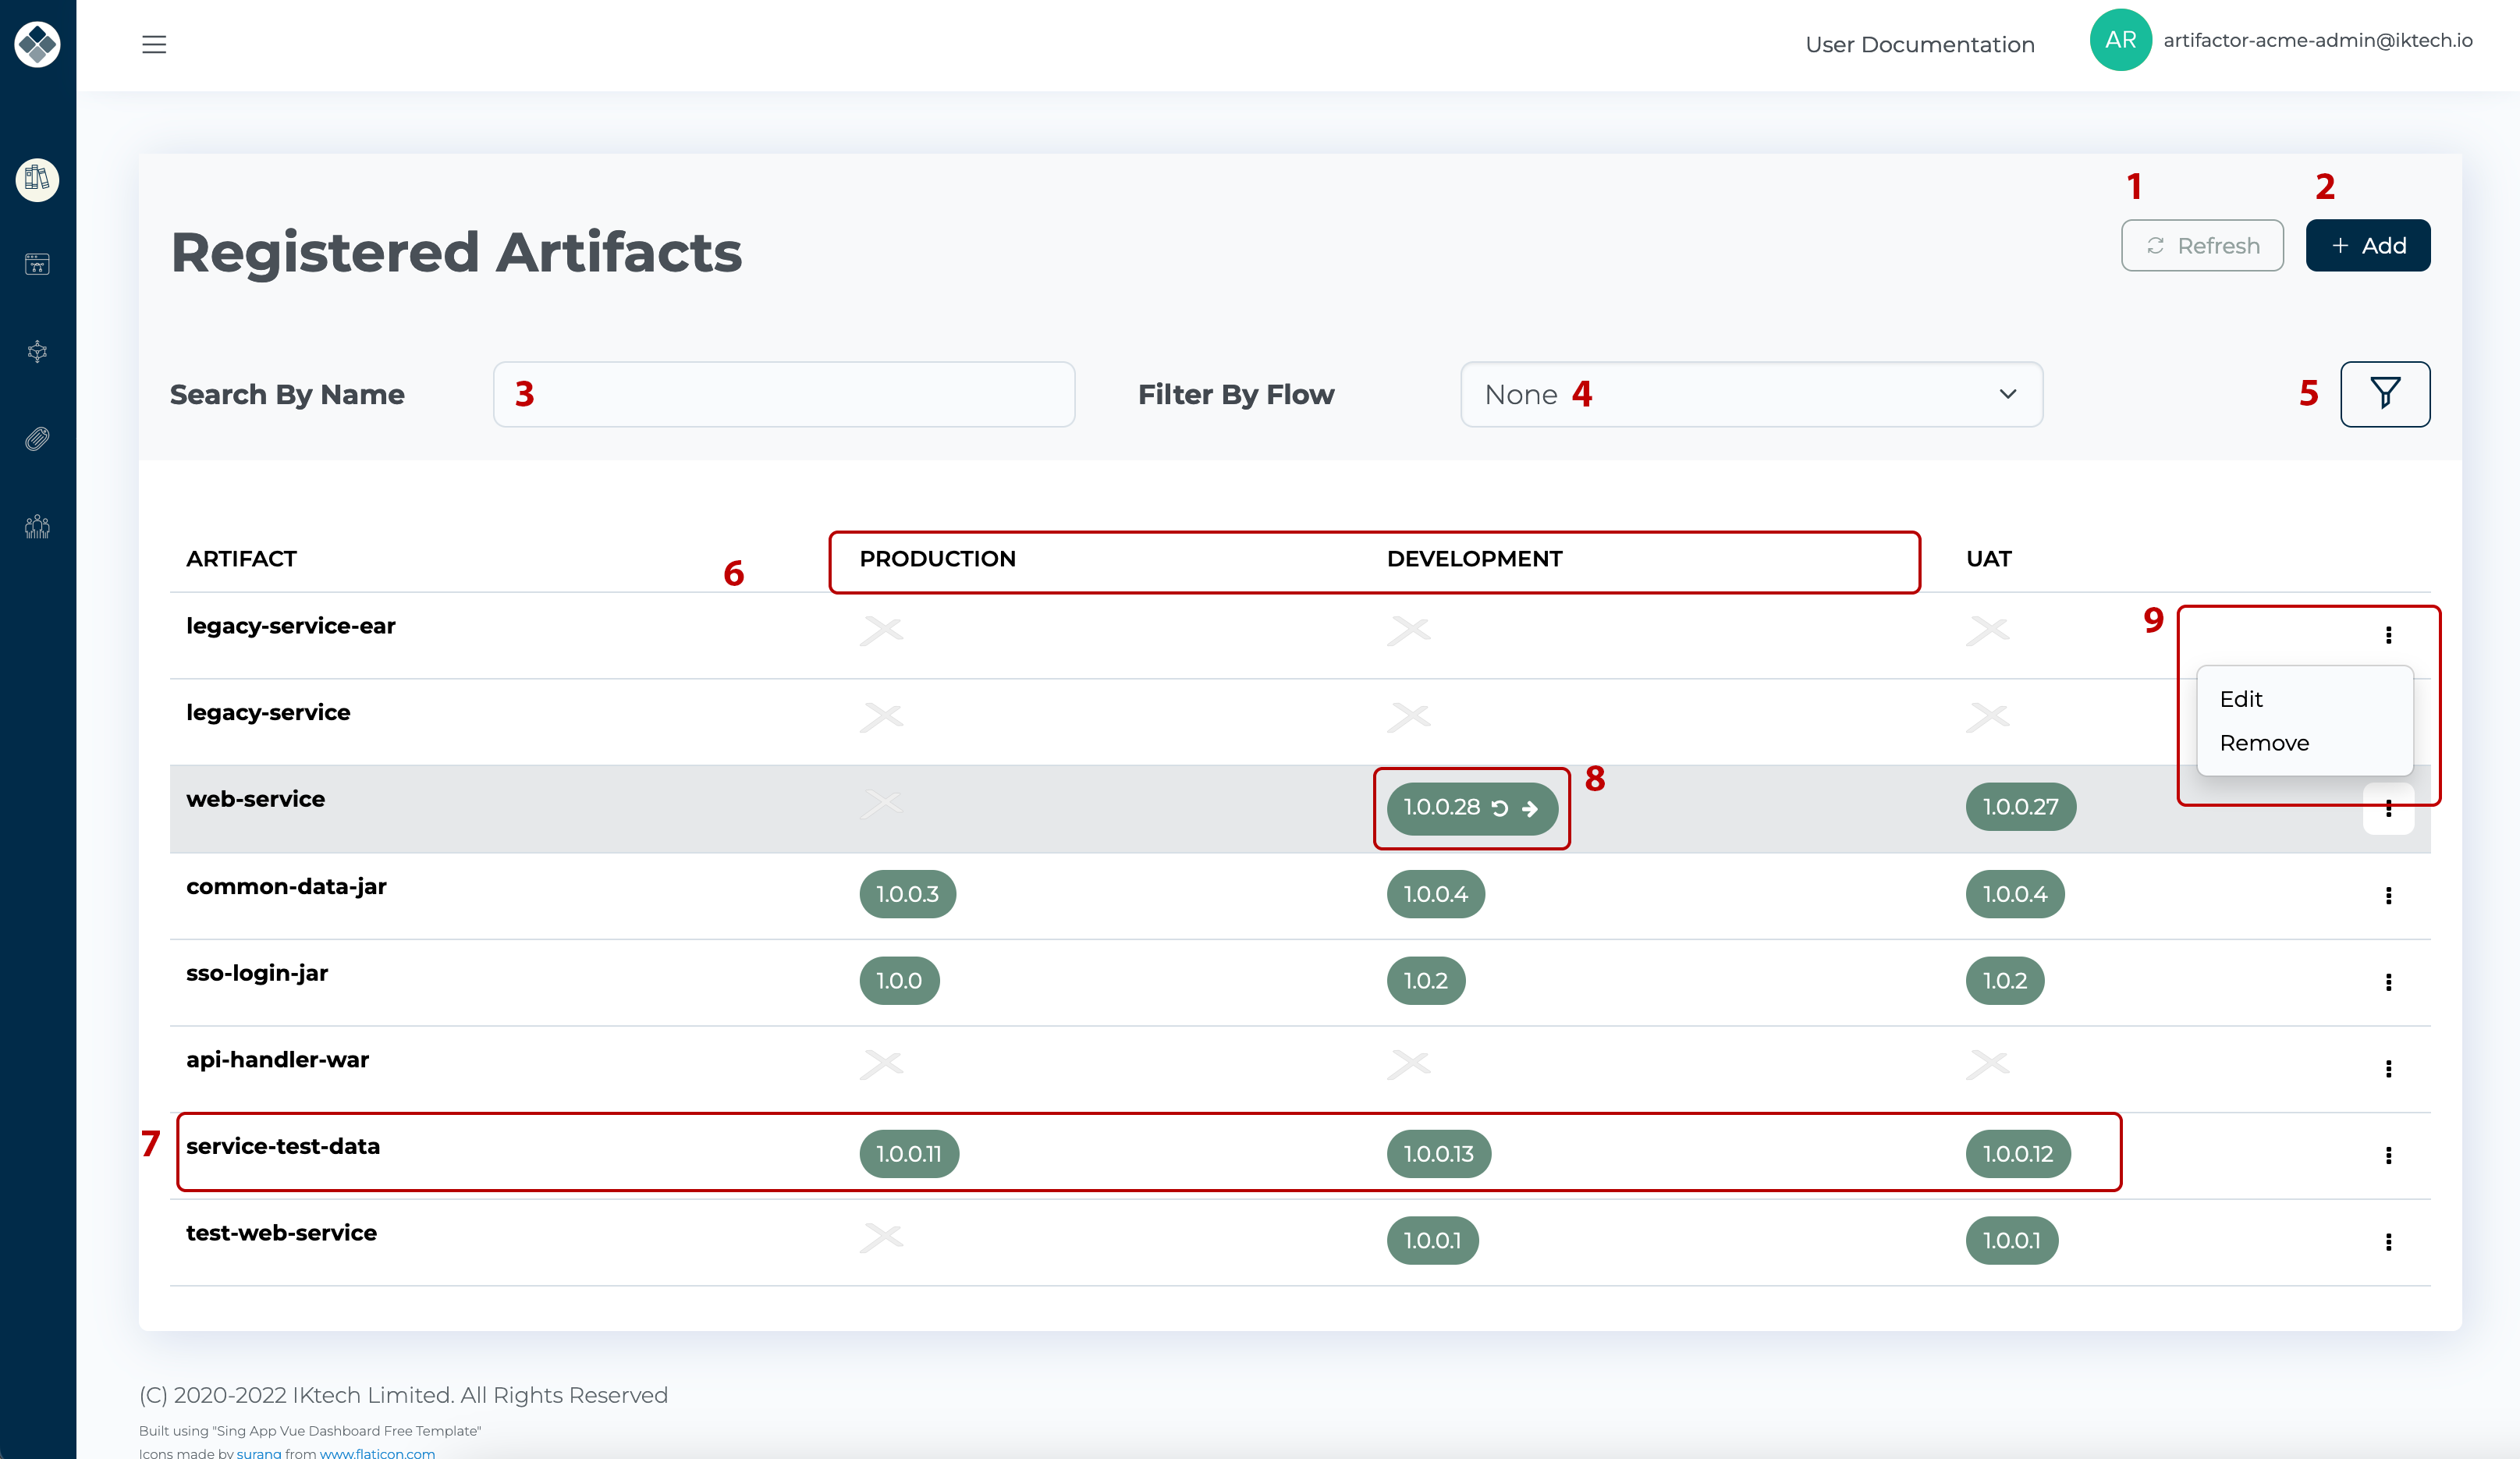
The “Add” button [2] at the top enables users to manually add an artifact. Although the primary method for adding artifacts to the system is via API calls from the pipeline, manual addition is also possible.
Other controls at the top of the artifacts list facilitate content filtering in the Artifacts View. Clicking the “Refresh” button [1] reloads the current view’s content from the database while maintaining any previously applied filters.
Search for artifacts by name using the “Search By Name” input box [3]. A search action initiates after entering more than three characters.
Artifacts can be filtered by the flow they are attached to; simply select the desired flow from the “Filter By Flow” drop-down box [4].
The stages filter [5] enables selection of displayed stages.
Stage names [6] are displayed above artifact versions, with tags in a specific column corresponding to the related stage.
Each artifact will have a name displayed on the far left and a set of version tags for each stage. On the right, a button allows to open a context menu from which users can edit or deletion artifact in question.
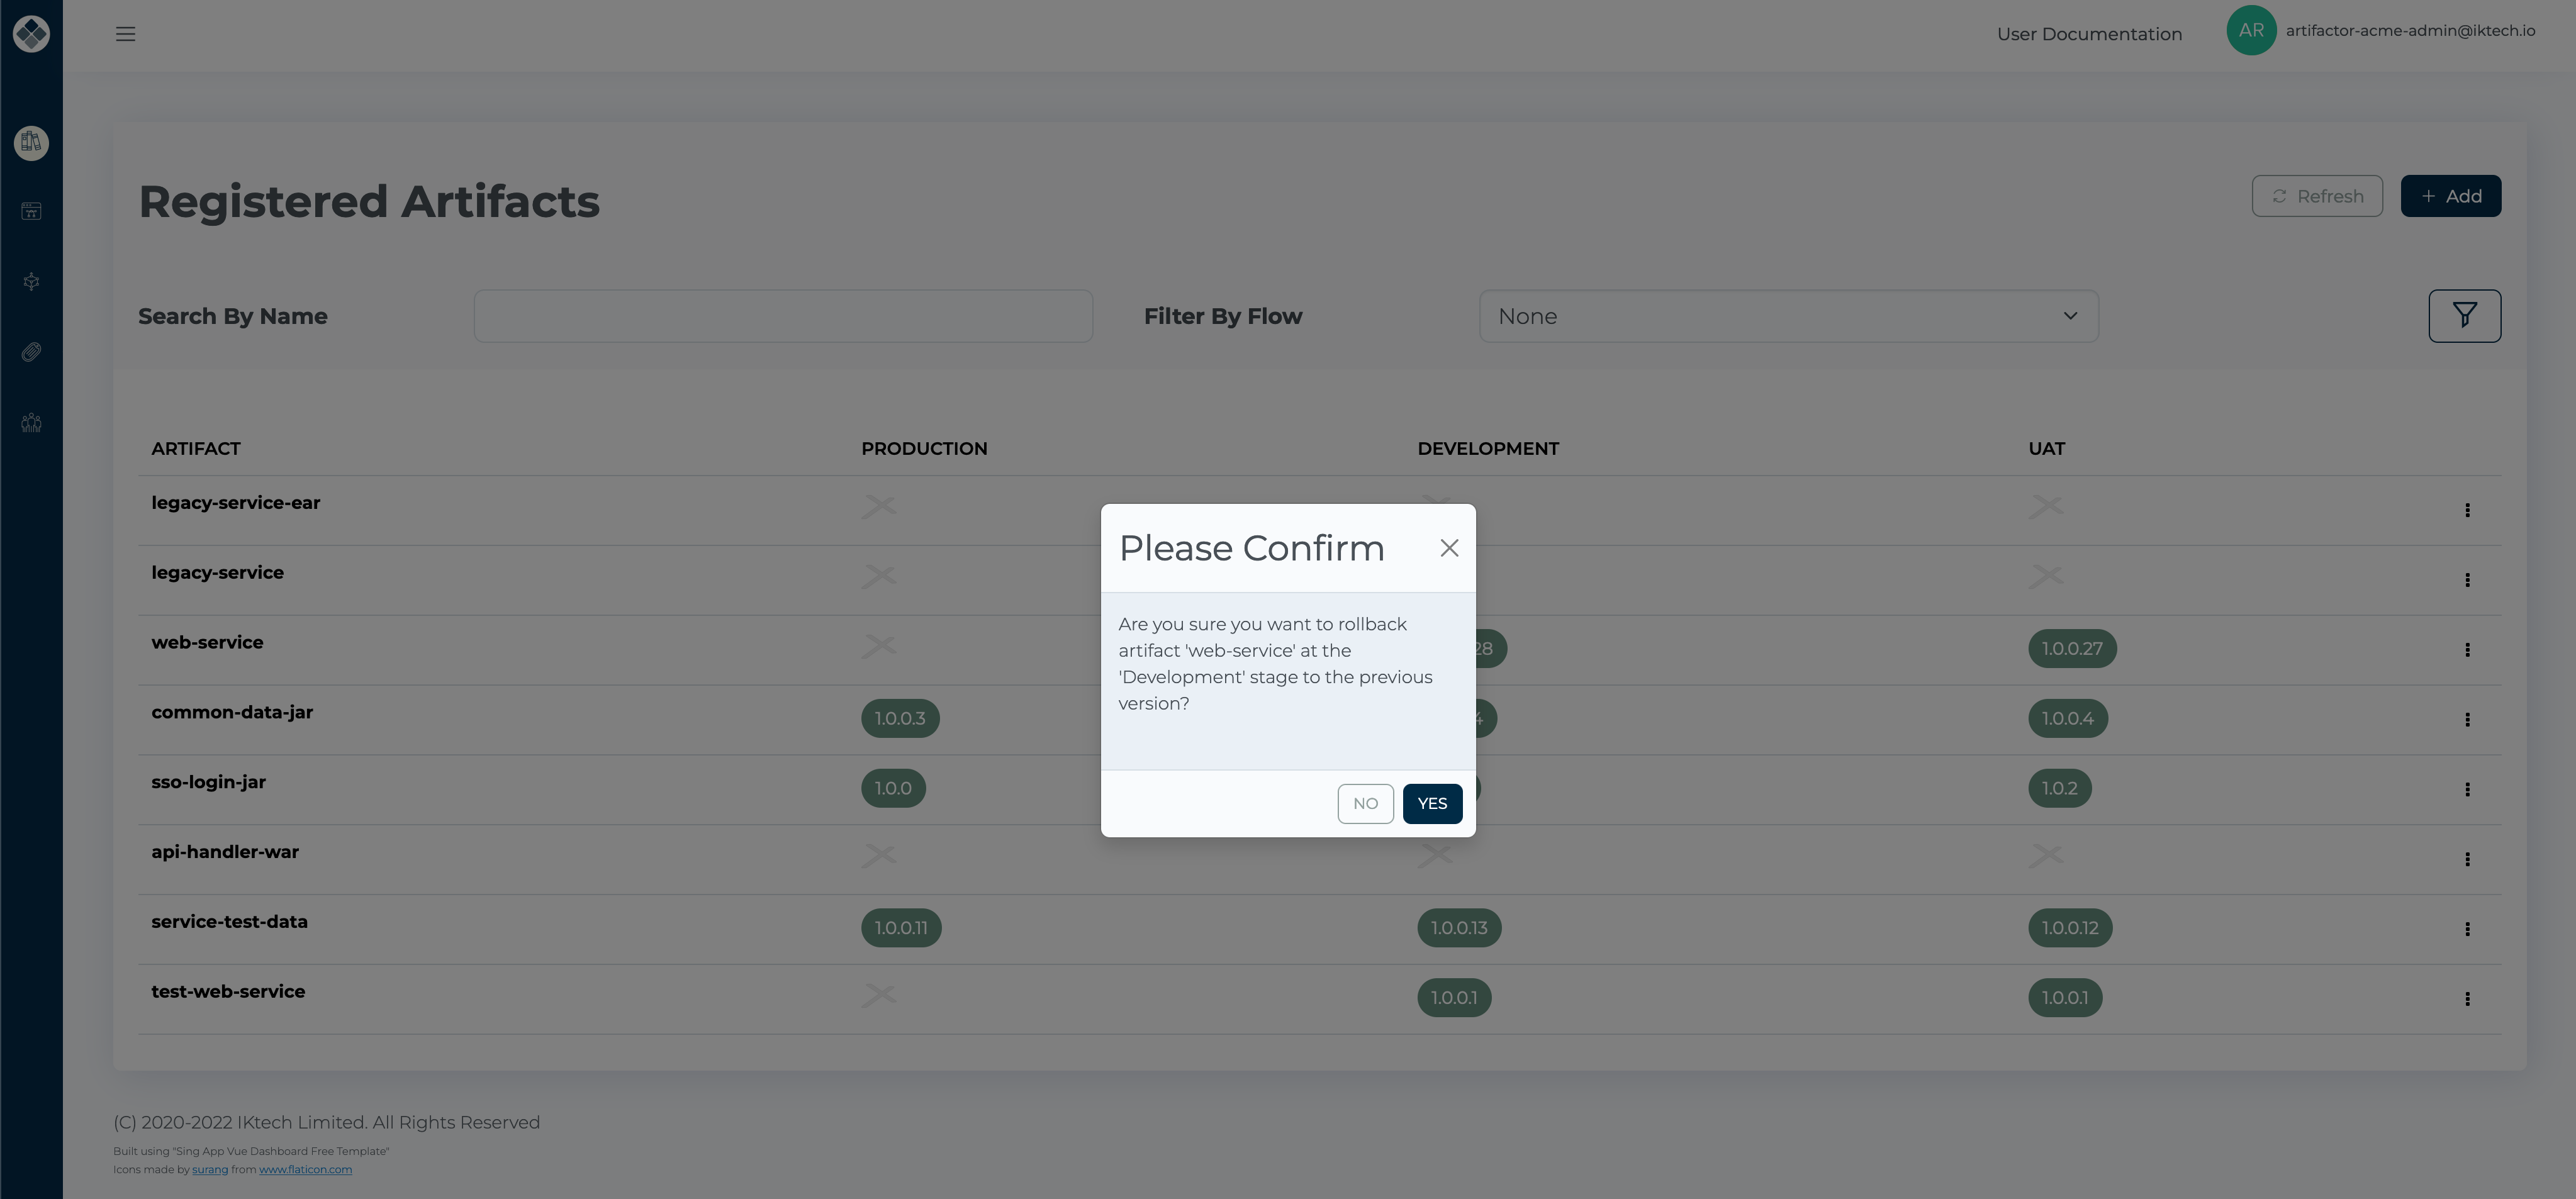
When user hovers their mouse pointer over a version tag, buttons will appear on the right hand side of the tag [8]. If an artifact is attached to a flow, a small arrow, visible next to the version tag, allows users to manually push the artifact through the flow when clicked. A rollback button always appear next to the version tag allowing user to return to a previous version at the stage. When clicked a confirmation dialog shown below appears prompting users to confirm their actions.
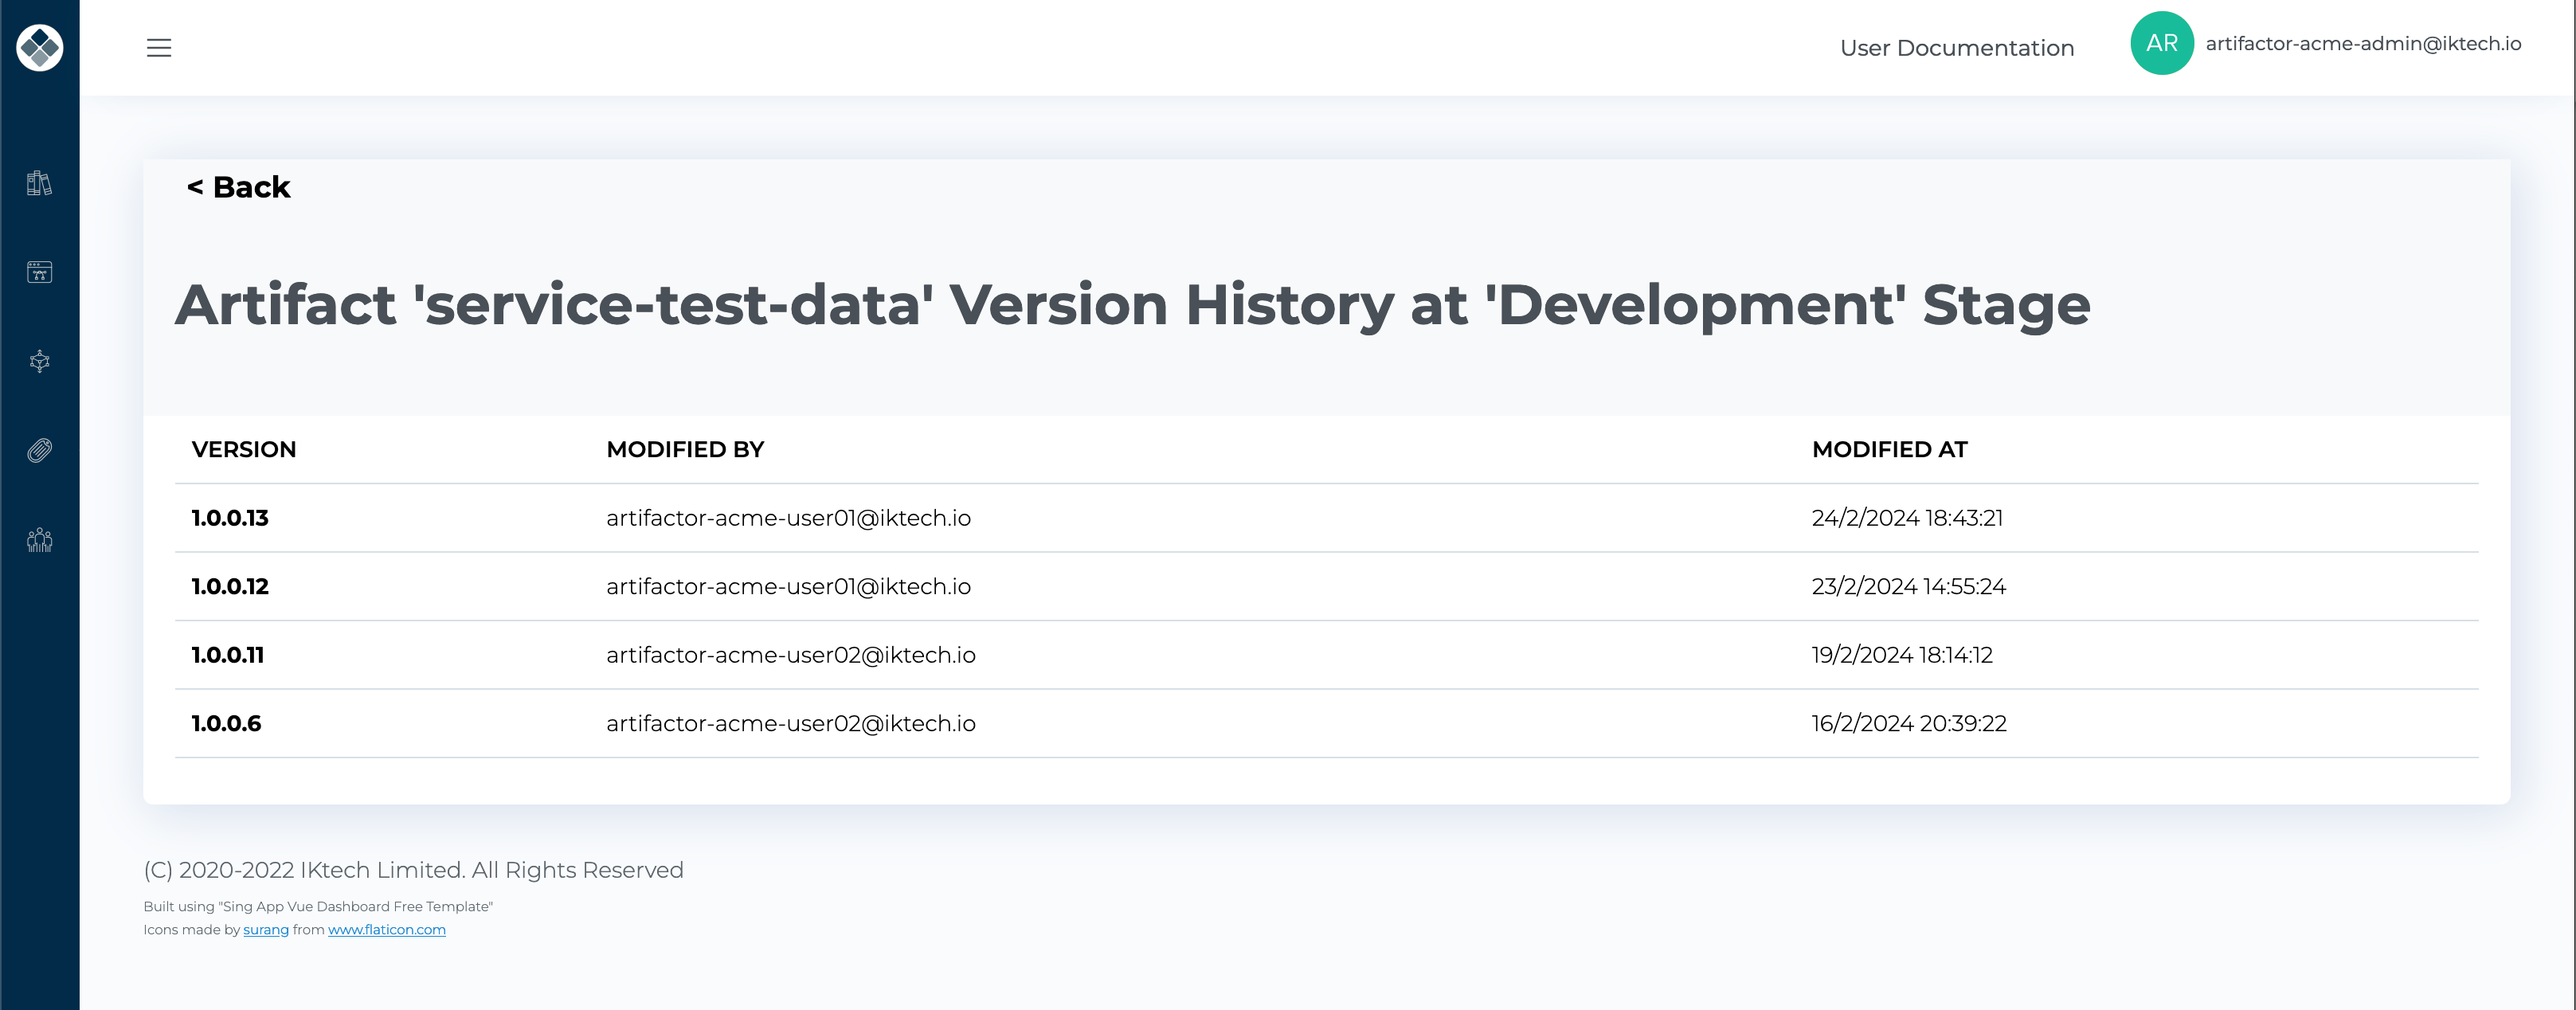
When user click the version tag a version history screen shown below appears:
To add an artifact, click the “Add” [2] button on the Artifact Viewer screen, prompting the following dialog to appear:
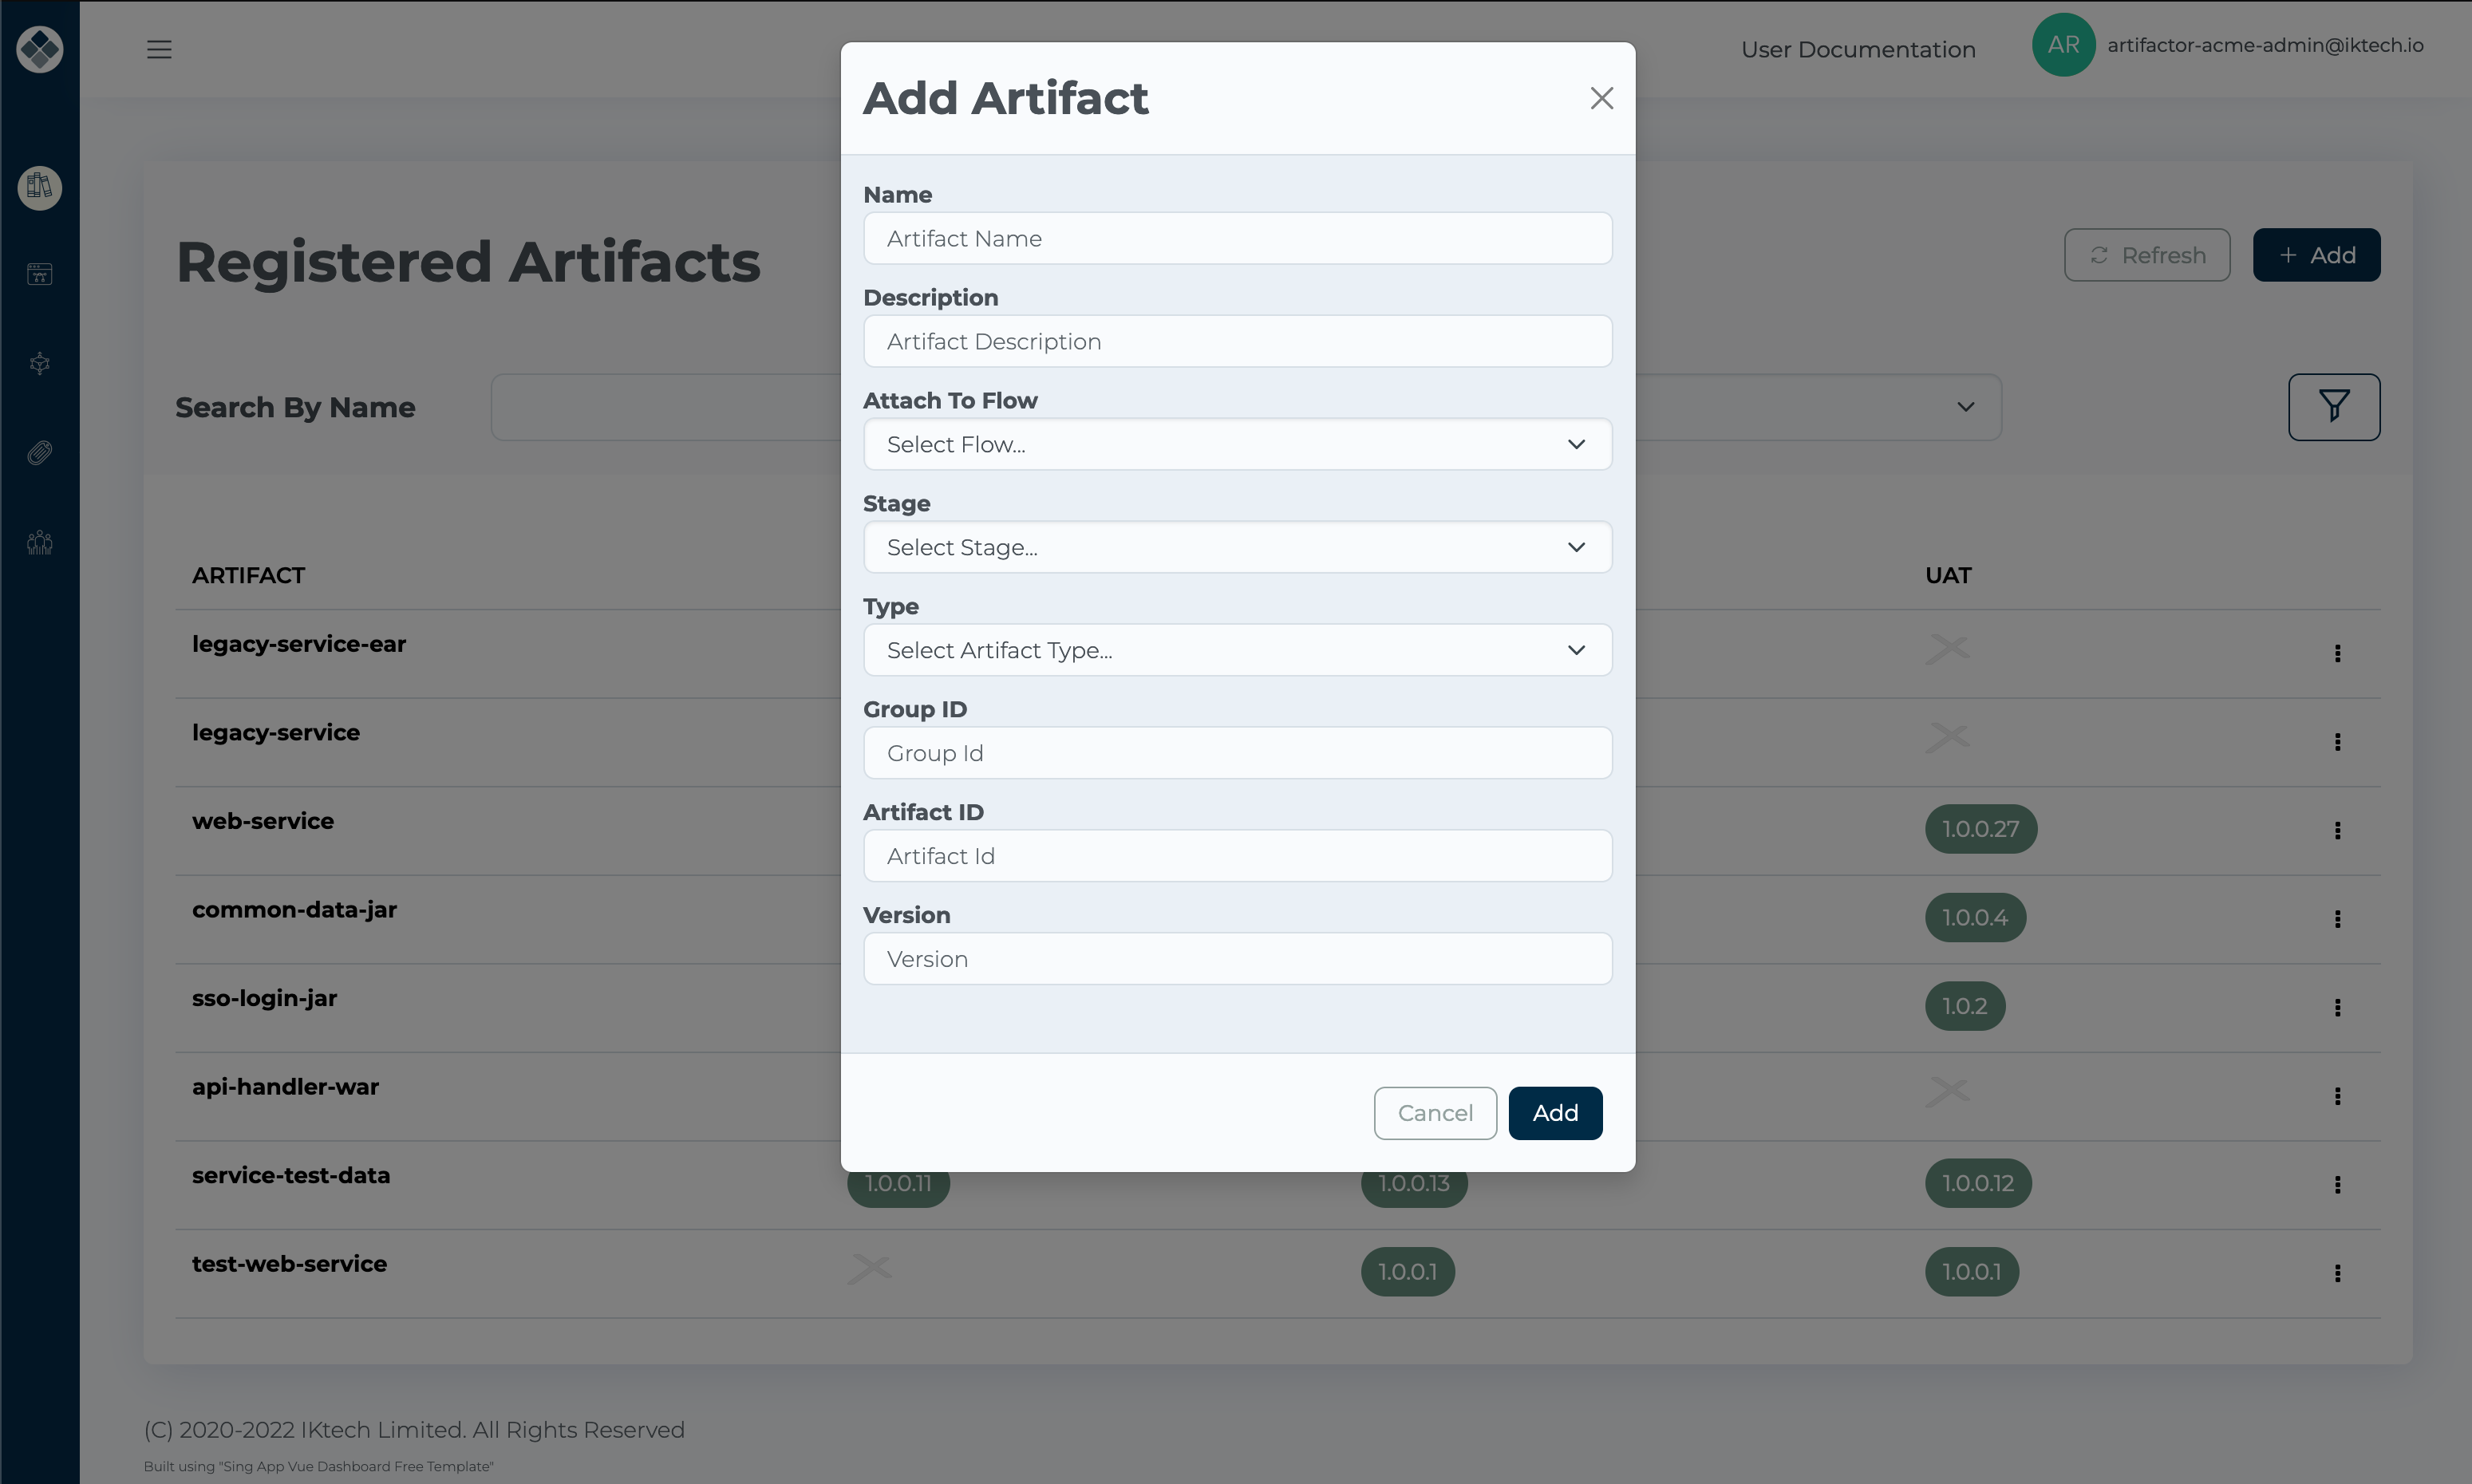
Entering the artifact name is mandatory, while providing a description is optional.
Additionally, you can attach the artifact to an existing flow by selecting it from the drop-down list.
You must select the stage where you wish to place the artifact.
If the artifact is attached to a flow, this stage must be the flow’s first stage.
Specify the type of artifact being added.
If the type is “Docker Image,” leave all options except version blank.
For Java-type artifacts, you must specify the Group and Artifact IDs.
After entering the artifact version you wish to save, click the “Add” button to finalize the addition.
To view artifact details click its name in the main area. This will bring you to the Artifact Details screen which looks like this:
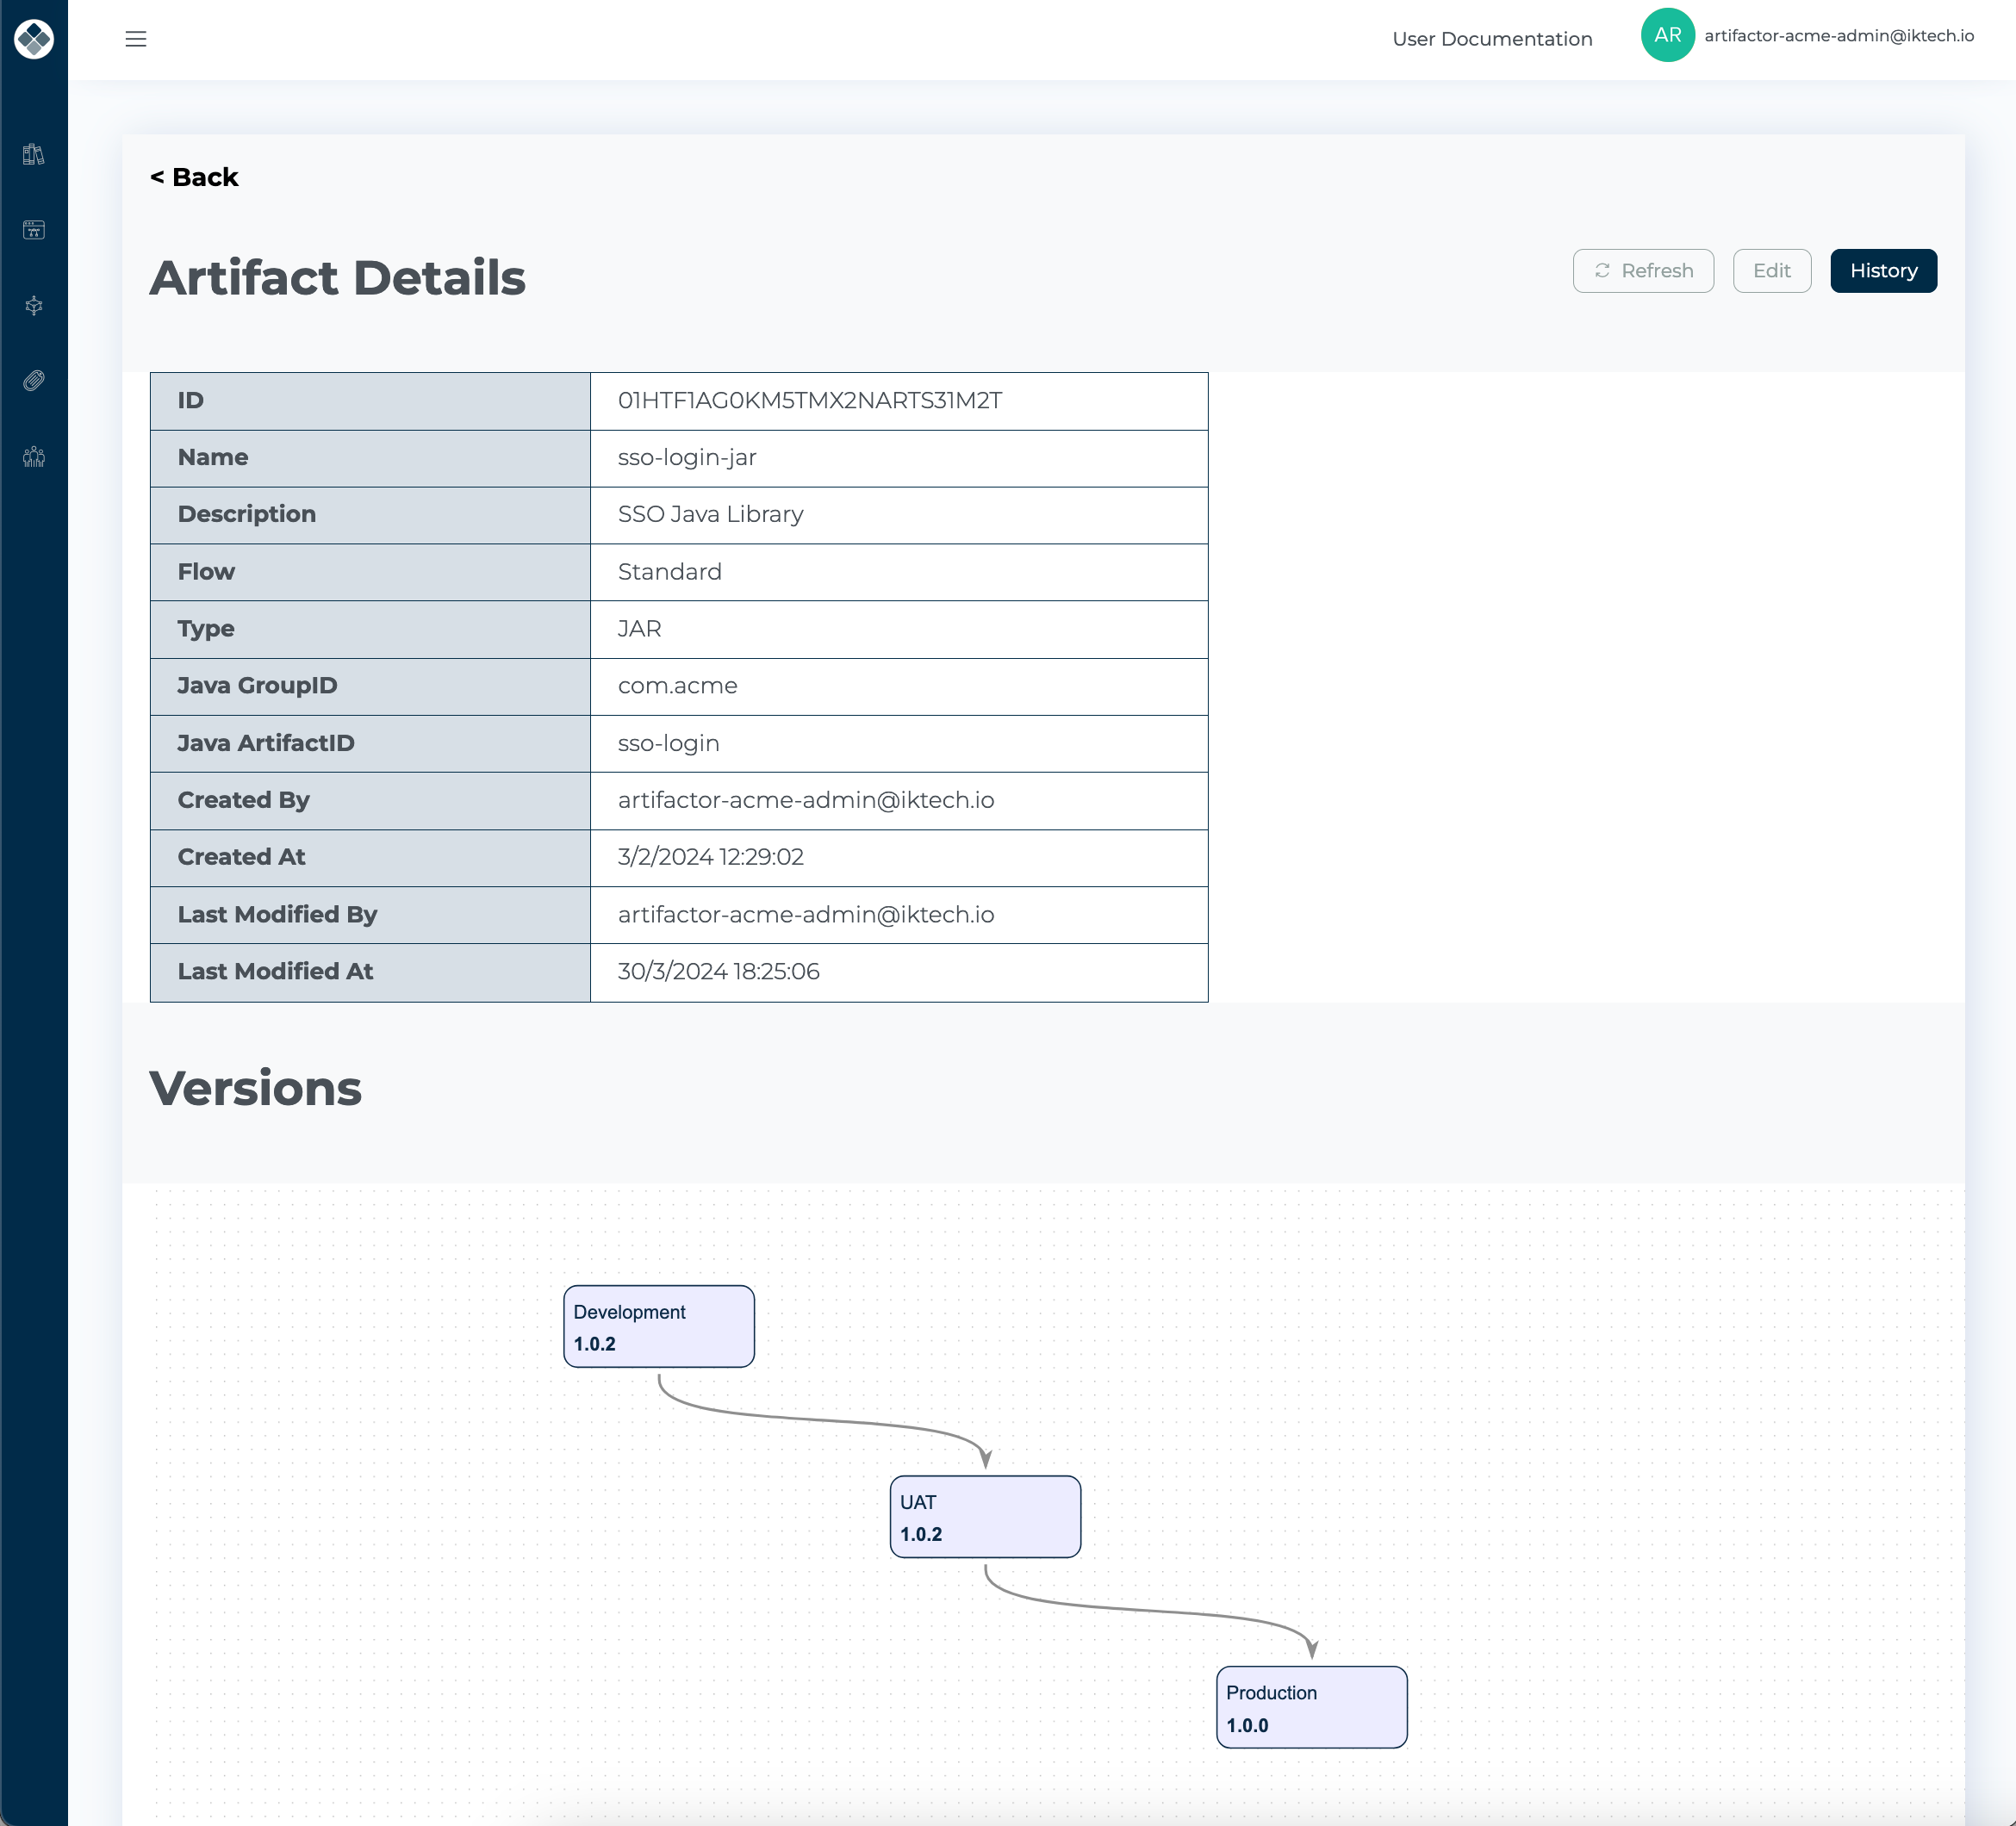
The screen has three parts. On the top there are three buttons allowing to refresh the content of the screen, edit artifact in question or display the history of the artifact details changes.
Just below there is a table showing the artifact metadata.
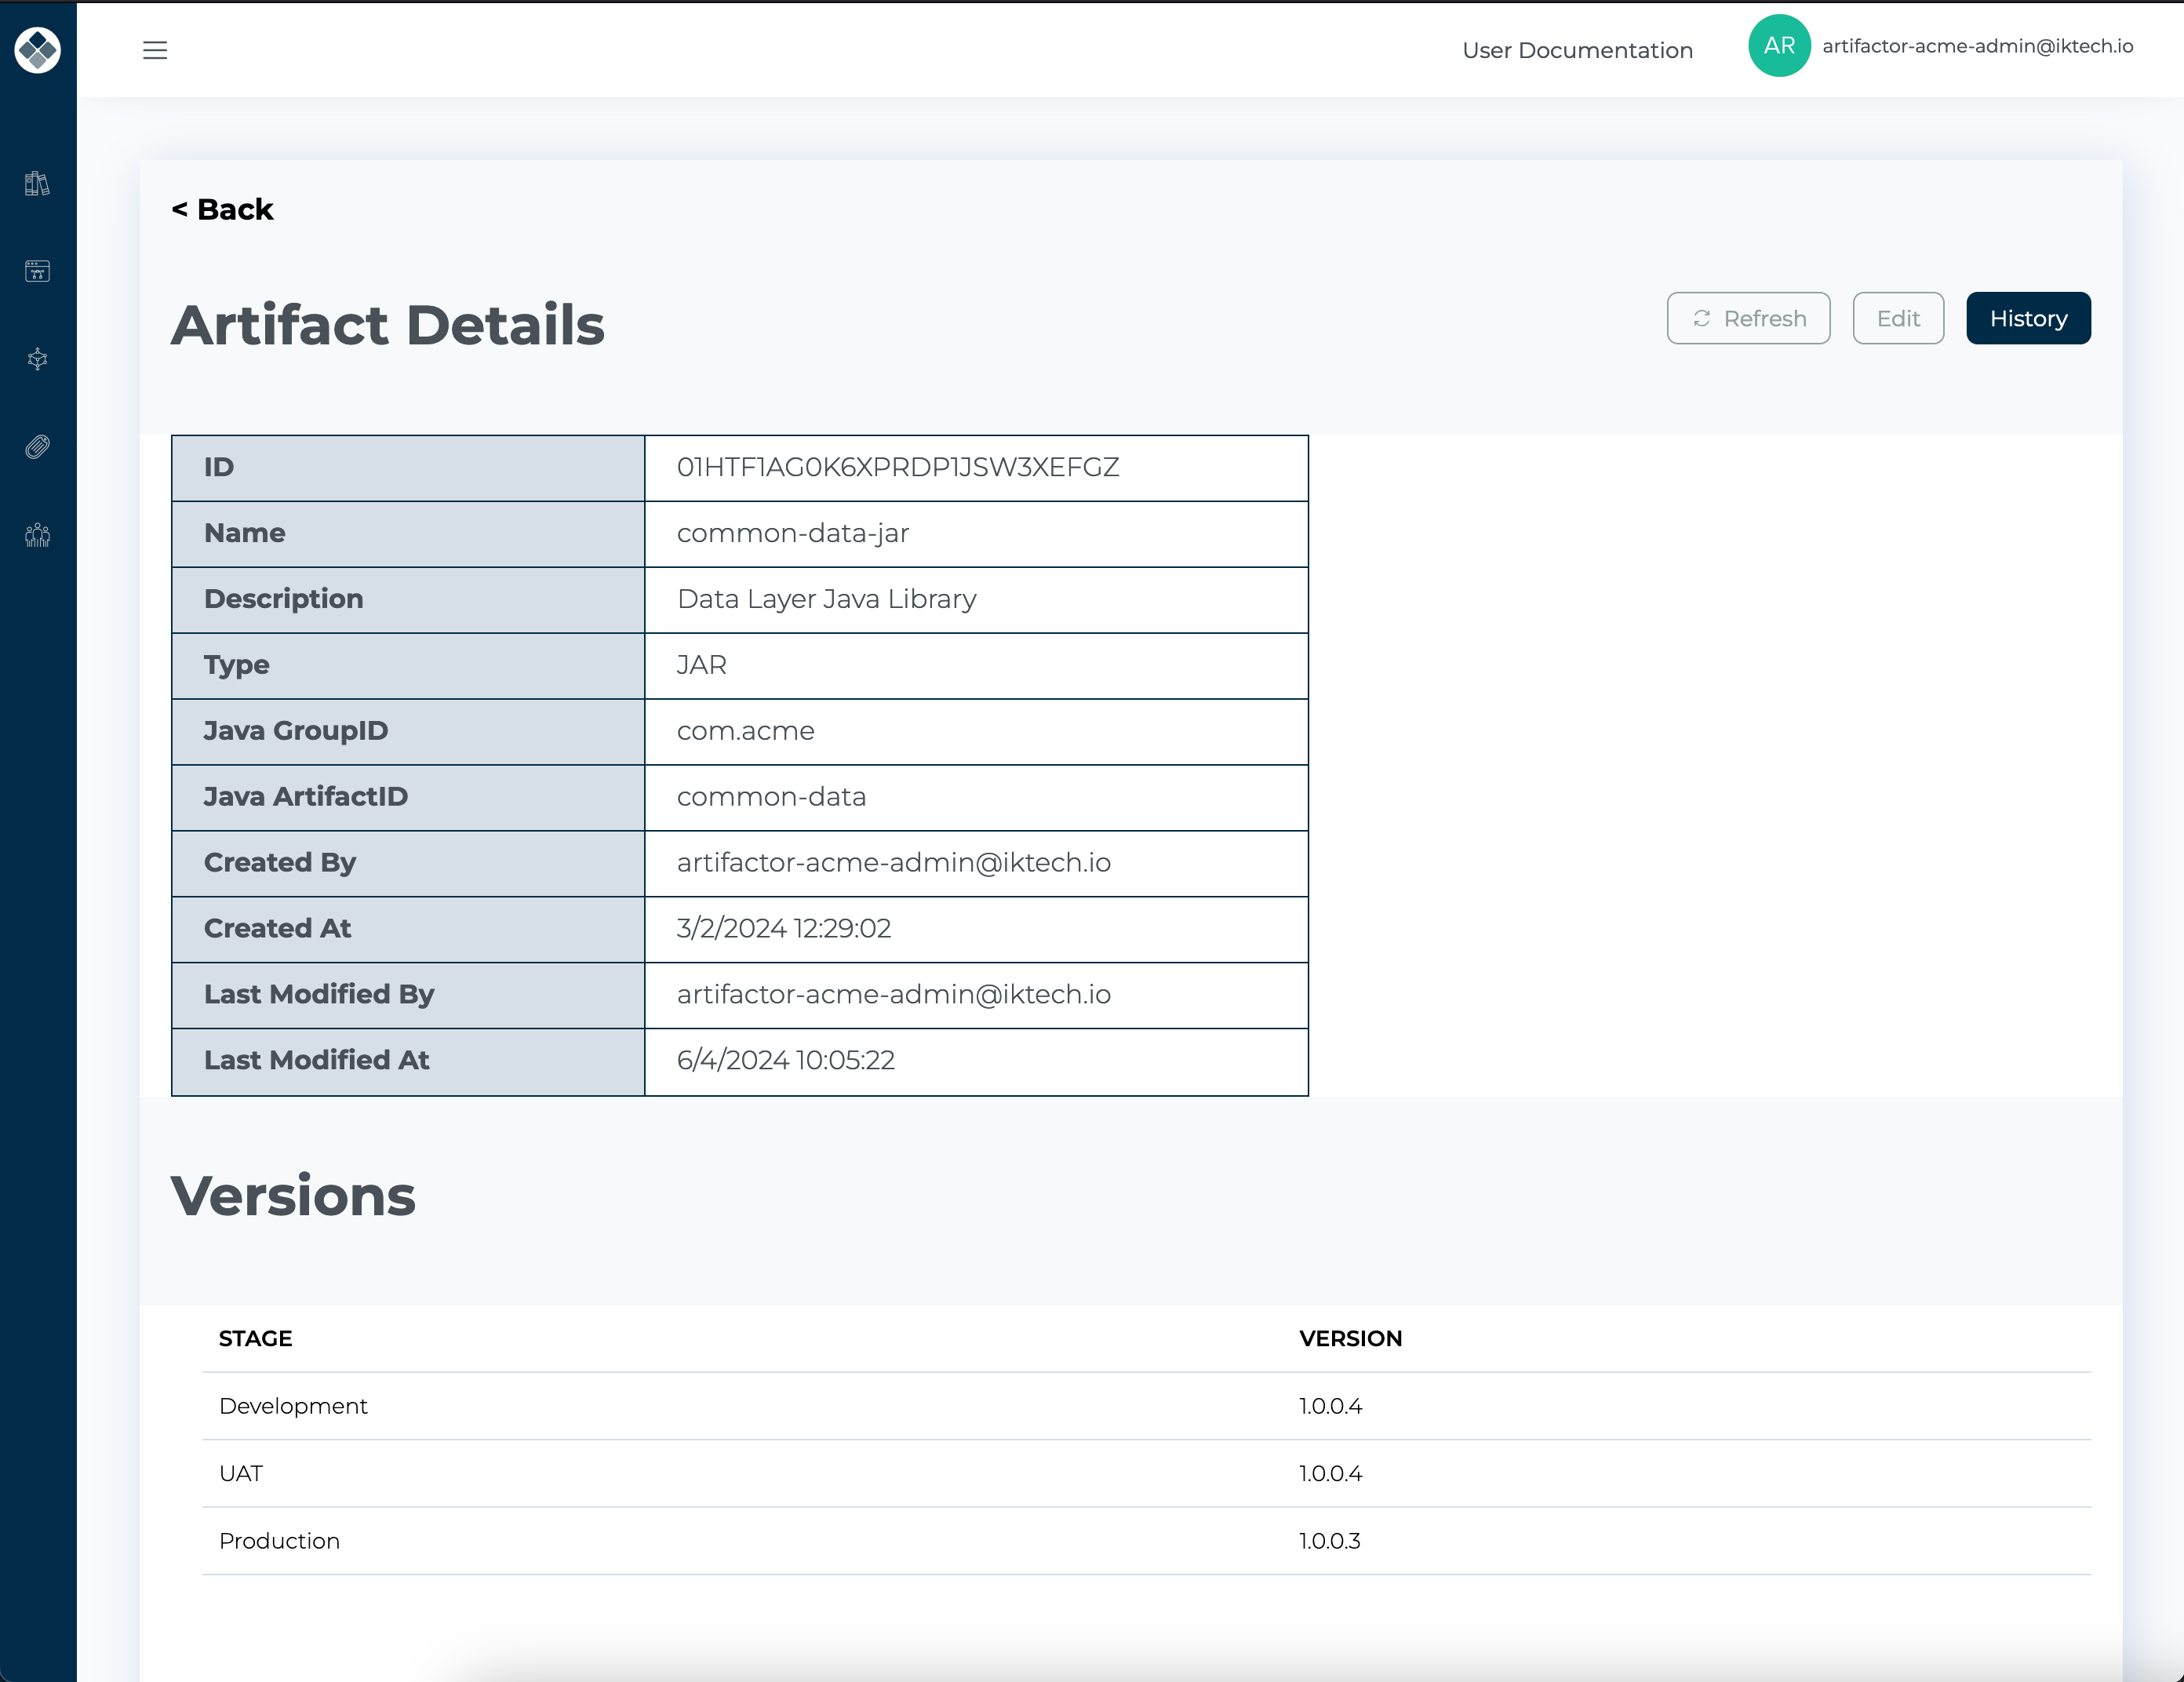
And below you can see the current artifact versions at each stage where the version is registered.
If artifact is associated with the flow, you will see the versions as a diagram showing all the stages of the flow, connections between them and current version at each stage where they exist.
If artifact is not associated with the flow, the version details will be present as a table.
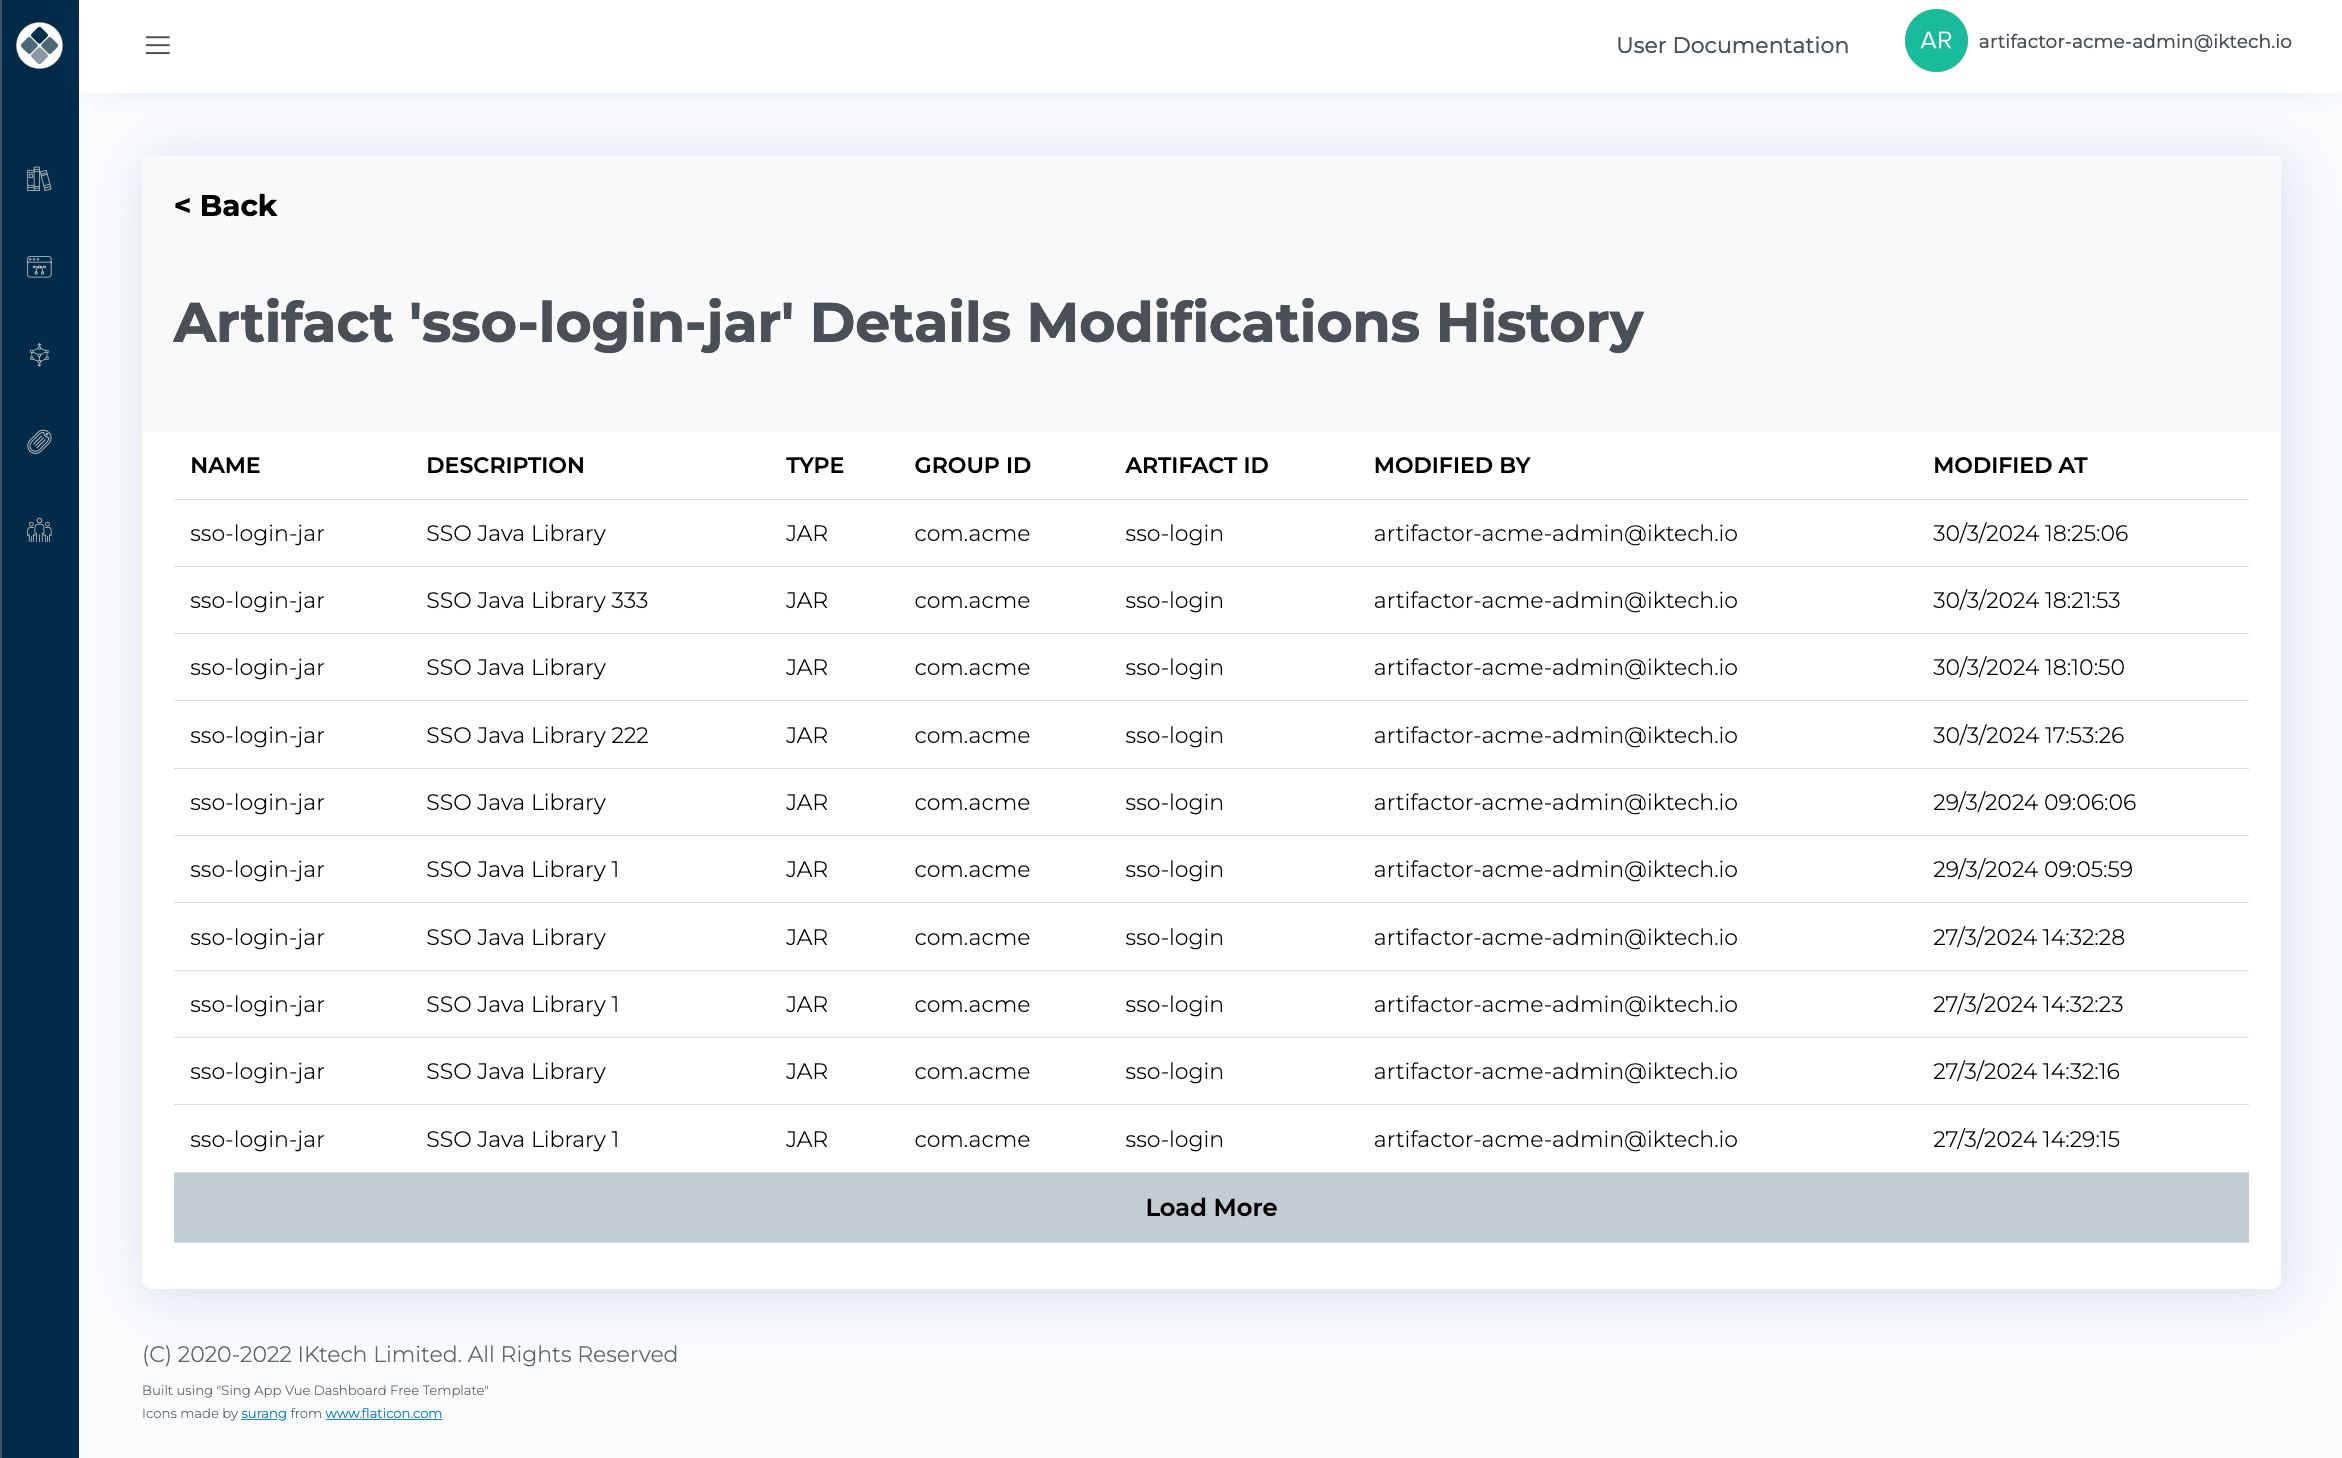
When user clicks the ‘History’ button above the following screen appears: